Bird Photography:
A Passion of Time Part II
by B. Moose Peterson
 Successful
bird photographers know two things intimately: technology and biology!
You can most definitely shoot from the hip and come back with some
incredible bird images, but this is by far the exception and not the
rule. To capture the magnificence of birds time and time again, you must
learn to marry technology with biology. What follows is what I've
learned over the years. Make no mistake though, I don't have all the
answers, as I'm still learning. That, of course, is part of the fun! Successful
bird photographers know two things intimately: technology and biology!
You can most definitely shoot from the hip and come back with some
incredible bird images, but this is by far the exception and not the
rule. To capture the magnificence of birds time and time again, you must
learn to marry technology with biology. What follows is what I've
learned over the years. Make no mistake though, I don't have all the
answers, as I'm still learning. That, of course, is part of the fun!
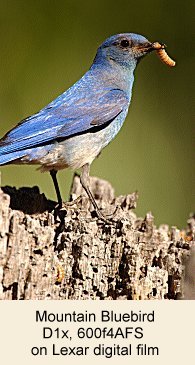
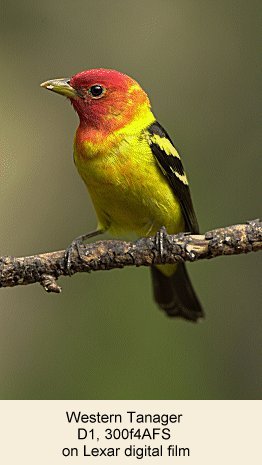 Photographing
Perching Birds. These little squirts can be the most frustrating
subjects to land in front of your lens at times. Their very nature is to
always be on the move, typically searching for either food or cover.
Being the smaller members of the bird family, they are typically a prey
source for others, such as falcons, owls and some hawks. Of all the
birds, the group commonly labeled as perching birds seem to have the
least fun at being a bird. The best way I know of photographing these
little jewels is to have them come to you. And the best way I know of
having them come to you is by attracting them to feeders and birdbaths! Photographing
Perching Birds. These little squirts can be the most frustrating
subjects to land in front of your lens at times. Their very nature is to
always be on the move, typically searching for either food or cover.
Being the smaller members of the bird family, they are typically a prey
source for others, such as falcons, owls and some hawks. Of all the
birds, the group commonly labeled as perching birds seem to have the
least fun at being a bird. The best way I know of photographing these
little jewels is to have them come to you. And the best way I know of
having them come to you is by attracting them to feeders and birdbaths!
First and foremost, the goal here is not to photograph birds on
feeders or at baths. Yes, you can do that but we are mainly using
feeders and baths to get the birds in front of our lenses on perches,
either occurring naturally or those we've placed. Since the feeders and
baths aren't our main goal, they don't have to be anything fancy. This
however is coming from a guy with 20+ feeders of every shape and size,
countless birdbaths and a new office designed so that I can photograph
the birds from my desk while I work!
 First
you need to determine which birds are in your area that you can attract.
This can be done a couple of ways, the best way being just to look out
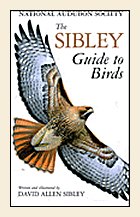
the window. Another is a bird book such as The
Sibley Guide to Birds, which is the best book out there on the
subject. You can almost guarantee yourself that in the beginning, only a
few of the local resident birds will appear at your offerings. But with
time, you'll draw in all sorts of birds you didn't expect. This means
you need to have "generic" food like sunflower seed and suet
that attracts many different bird species. The bird baths use regular
water, not much to determine there. If you live in an area where the
temps at night go below freezing, get a heater for your bath. You'll
find that water attracts more birds than seed alone. First
you need to determine which birds are in your area that you can attract.
This can be done a couple of ways, the best way being just to look out
the window. Another is a bird book such as The
Sibley Guide to Birds, which is the best book out there on the
subject. You can almost guarantee yourself that in the beginning, only a
few of the local resident birds will appear at your offerings. But with
time, you'll draw in all sorts of birds you didn't expect. This means
you need to have "generic" food like sunflower seed and suet
that attracts many different bird species. The bird baths use regular
water, not much to determine there. If you live in an area where the
temps at night go below freezing, get a heater for your bath. You'll
find that water attracts more birds than seed alone.
 Placement
of your feeders and baths are important, in both attracting birds and
photographing them. Birds will come more often and regularly to feeders
and baths that have some sort of cover within 10 -15 yards of them.
Photographically, you want to place feeders where there are perches
(either natural or ones you create) that have the light on them the time
of day that you can photograph them with the best backgrounds. Since
none of this is permanent, you can change things around once you see how
birds take to your yard, but keep these factors in mind. Once all of
this is accomplished, you can start shooting. Placement
of your feeders and baths are important, in both attracting birds and
photographing them. Birds will come more often and regularly to feeders
and baths that have some sort of cover within 10 -15 yards of them.
Photographically, you want to place feeders where there are perches
(either natural or ones you create) that have the light on them the time
of day that you can photograph them with the best backgrounds. Since
none of this is permanent, you can change things around once you see how
birds take to your yard, but keep these factors in mind. Once all of
this is accomplished, you can start shooting.
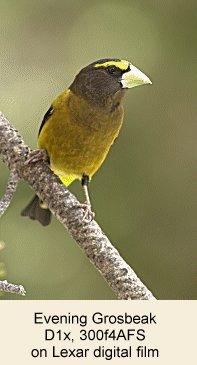
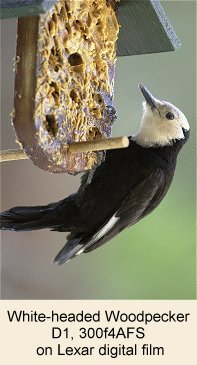
 The
photography is truly the best part! I love watching the birds at my
gazillion feeders, but I love photographing them even more. With the
building of our new office with all of its new windows and bird feeders,
I went looking for the "perfect" bird feeder lens to shoot
with and found it in the Nikon 300f4 AFS. What, a lens so short for bird
photography you say? Keep in mind these two things: one, we're bringing
the birds in close physically so you don't need a lot of lens and two,
I'm shooting with the D1H so the 300f4 is a 450f4. More importantly, the
300f4AFS focuses down to five feet! The lens is also very small and easy
to use inside compared to say a 600f4. The
photography is truly the best part! I love watching the birds at my
gazillion feeders, but I love photographing them even more. With the
building of our new office with all of its new windows and bird feeders,
I went looking for the "perfect" bird feeder lens to shoot
with and found it in the Nikon 300f4 AFS. What, a lens so short for bird
photography you say? Keep in mind these two things: one, we're bringing
the birds in close physically so you don't need a lot of lens and two,
I'm shooting with the D1H so the 300f4 is a 450f4. More importantly, the
300f4AFS focuses down to five feet! The lens is also very small and easy
to use inside compared to say a 600f4.
The way I approach photographing the birds is real simple. The
300f4AFS is attached to the D1H,
a SB-28dx powered by the SD-8a with Power
Ex batteries is attached to Really
Right Stuff Flash Arm . This sits atop a Gitzo 1348 tripod with
Gitzo 1377 head. All of this is set up and pointed at the perch I want
to concentrate on. Then, when the light is right, I sit, drink some iced
tea (in the summer) or coffee (in the winter) and wait for the birds.
I've already prefocused on the perch so when they land, I take their
picture. It has to be some of the most enjoyable and rewarding
photography I know of. Give it a try!
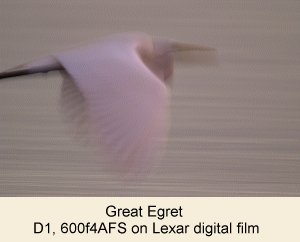
 Waders.
When you say wading birds, most folks automatically think of Florida
and rightfully so. But there aren't many places in North America where
you can't find a Great Blue Heron to photograph, so these techniques for
photographing wading birds are applicable to nearly any place you want
to shoot. Waders.
When you say wading birds, most folks automatically think of Florida
and rightfully so. But there aren't many places in North America where
you can't find a Great Blue Heron to photograph, so these techniques for
photographing wading birds are applicable to nearly any place you want
to shoot.
First thing with photographing wading birds is the camera gear.
Because the birds are so tall compared to other bird species, you can
get away with less lens and still capture nice images, but this is not
preferred. A 400mm lens is definitely the smallest lens you can use with
wading birds with success, I prefer the 600f4 with 1.4x myself. This is
because wading birds tend to live in a busy world. No they don't have a
ton of appointments, but rather lots of twigs, branches, grasses and
other objects that can "clutter" up an image. The narrow angle
of view of the 600/1.4 combo aids in eliminating busy elements and
selecting the cleanest background to make the subject pop.
 Because
of where the wading birds tend to live and the use of big lenses, a
tripod is a must. The tripod must be a stout one. I prefer the Gitzo
1548 with Wimberley
Head personally for two reasons. The most important is because
the mud, sand, dirt and water where you normally have to set up to
photograph wading birds is not a firm footing for tripods. Since you
can't get stability from the ground, your tripod must make up for it in
its construction. Second, the Gitzo 1548 is a carbon fiber tripod, which
can take the punishment of the environment, mud, salt water and the
like. The Wimberley likewise provides a stable yet flexible platform
from which to operate that big lens. Because
of where the wading birds tend to live and the use of big lenses, a
tripod is a must. The tripod must be a stout one. I prefer the Gitzo
1548 with Wimberley
Head personally for two reasons. The most important is because
the mud, sand, dirt and water where you normally have to set up to
photograph wading birds is not a firm footing for tripods. Since you
can't get stability from the ground, your tripod must make up for it in
its construction. Second, the Gitzo 1548 is a carbon fiber tripod, which
can take the punishment of the environment, mud, salt water and the
like. The Wimberley likewise provides a stable yet flexible platform
from which to operate that big lens.
When you have that big lens on a tripod on unstable ground, there's
one thing you must make sure you do for sharp images. You must be sure
that every time you set up your tripod that you push the front tripod
leg down into the ground a tad (and
use proper long lens technique). Because of the physical nature
of mud, sand and the like, "resting" your tripod on the
surface is not as stable as if you simply push one tripod leg in
slightly. This little thing makes a big difference!
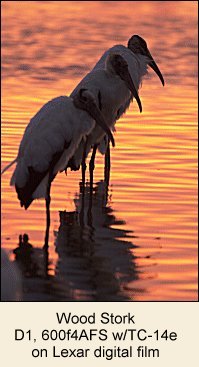 Light is
a very important element in photography (see It's
the Light! in the August issue) but critically so when
photographing wading birds! This is because the birds themselves are
often all white and quite often they are in water. This sets up that
infamous white bird in blue water scenario made so famous by those not
understanding light. Now if you read the Light Article you'll know that
this scenario is not a metering nightmare if the LIGHT is three stops or
less. You'll find when photographing wading birds, success comes when
you shoot in this kind of light even if the bird is all blue/gray like a
Reddish Egret. Light is
a very important element in photography (see It's
the Light! in the August issue) but critically so when
photographing wading birds! This is because the birds themselves are
often all white and quite often they are in water. This sets up that
infamous white bird in blue water scenario made so famous by those not
understanding light. Now if you read the Light Article you'll know that
this scenario is not a metering nightmare if the LIGHT is three stops or
less. You'll find when photographing wading birds, success comes when
you shoot in this kind of light even if the bird is all blue/gray like a
Reddish Egret.
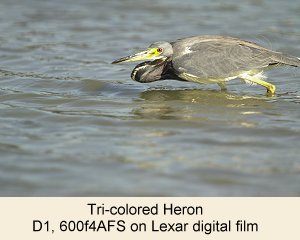
The other element in photographing wading birds that comes up more
than with other bird species is the image format. Wading birds with
their long legs tend to make great verticals yet many folks still try to
cram them into horizontals. Is there a rule I can pass along in regards
to this? Nope. My good friend Artie Morris likes to tell folks to leave
enough room to see the legs and feet even if those body parts are
underwater and not seen. Personally, since I'm not really an
"eyeball" shooter, I'm usually not that tight that I can't
shoot vertical or horizontal. If I am that tight for some reason, I can
always take off my 1.4 teleconverter and become "untight." I
have no quick answers for you, but now that you're aware of it, I bet
you'll find the right answer for you.
 When it
comes to getting close physically to wading birds, you need two things
in your favor, either food or sex (as in the birds are thinking about
these things, not you). Wading birds can be on the flighty side of life
so if they are feeding or have sex on their minds (springtime when they
look their best), you can get closer physically. If this is not the
case, you must approach slowly, I mean slowly. As I remind folks all the
time, don't be in a hurry to get nothing! When it
comes to getting close physically to wading birds, you need two things
in your favor, either food or sex (as in the birds are thinking about
these things, not you). Wading birds can be on the flighty side of life
so if they are feeding or have sex on their minds (springtime when they
look their best), you can get closer physically. If this is not the
case, you must approach slowly, I mean slowly. As I remind folks all the
time, don't be in a hurry to get nothing!
Here's one last note on photographing wading birds. These are
incredibly elegant birds with great lines. Use this to your advantage!
The S curve of the neck alone, the giant C curve of the whole body,
these lines in concert with great light makes for great images, every
time!
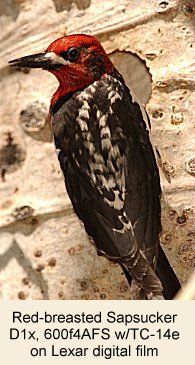
 Woodpeckers.
These wood dwelling, small dark birds of the forest are a favorite
of mine! They are a challenge for many reasons, the main one being that
they are constantly on the move. The only exceptions are when they are
nesting or at a bird feeder. I have many at my feeders so you can refer
to that section of this article for photographing them up close. The
other option is when they are at their nesting cavity, which is a way
cool time to photograph them. Woodpeckers.
These wood dwelling, small dark birds of the forest are a favorite
of mine! They are a challenge for many reasons, the main one being that
they are constantly on the move. The only exceptions are when they are
nesting or at a bird feeder. I have many at my feeders so you can refer
to that section of this article for photographing them up close. The
other option is when they are at their nesting cavity, which is a way
cool time to photograph them.
Finding their nest is a whole other article in itself, but here are
the facts in a nutshell. They are typically in some sort of wood, either
a tree or manmade structure. They make a new cavity each spring, as they
do not reuse old cavities (sometimes a bigger woodpecker might enlarge a
previous, smaller woodpecker cavity, but that's rare). So head out in
the winter and find standing dead trees and make note of them so in the
spring, you can revisit them. In the spring, revisit the trees and look
on the ground at the base of them. If there is a woodpecker making a
home in the tree, you'll find wood shavings on the ground. It's that
easy and if you find a cavity that's eight feet or lower, you're in
business.
 Because
woodpeckers make their nest in trees, which are normally highly
reflective, you'll want to photograph the nest when there is no direct
sun on the tree (keep in mind your subject is often black as well,
increasing the exposure range). This means you'll need to use flash as
flash fill. As a starting point, set your flash at -1/3 and you might
want to test it to see if for your own preferences that you want to go
to a lower amount of flash compensation. The other part of the technical
equation is the shutter speed. Woodpeckers move so you need to have a
shutter speed of about 1/60 or faster or you'll get
"ghosting." Ghosting is where the subject moves during the
exposure but the flash freezes part of that movement. If you don't have
TTL flash, don't even think about photographing nesting woodpeckers! Because
woodpeckers make their nest in trees, which are normally highly
reflective, you'll want to photograph the nest when there is no direct
sun on the tree (keep in mind your subject is often black as well,
increasing the exposure range). This means you'll need to use flash as
flash fill. As a starting point, set your flash at -1/3 and you might
want to test it to see if for your own preferences that you want to go
to a lower amount of flash compensation. The other part of the technical
equation is the shutter speed. Woodpeckers move so you need to have a
shutter speed of about 1/60 or faster or you'll get
"ghosting." Ghosting is where the subject moves during the
exposure but the flash freezes part of that movement. If you don't have
TTL flash, don't even think about photographing nesting woodpeckers!
 There
is really only one time to photograph nesting woodpeckers and that's
near the very end of the nesting cycle. This is when the kids are
sticking their heads out of the cavity to be fed. This is when the
photography is at its best. But before this happens, you want to visit
the nest site at least twice. Both times there are two things you should
take note of and work on. The first is your lighting; what's the best
time of day to photograph the nest? Once that is determined, take test
shots using your flash so when it comes time to photograph the kids, you
have everything dialed in. There
is really only one time to photograph nesting woodpeckers and that's
near the very end of the nesting cycle. This is when the kids are
sticking their heads out of the cavity to be fed. This is when the
photography is at its best. But before this happens, you want to visit
the nest site at least twice. Both times there are two things you should
take note of and work on. The first is your lighting; what's the best
time of day to photograph the nest? Once that is determined, take test
shots using your flash so when it comes time to photograph the kids, you
have everything dialed in.
Most importantly you need to watch the parents. Woodpeckers typically
don't come straight into the nest, but land on other trees before coming
to the nest tree and once they land on the nest tree, they normally land
on the opposite side of the tree from the nesting cavity. This biology
is something you need to see, learn and understand prior to really
shooting the nest for the majors. This is great fun and a very rewarding
family of birds to photograph at the nest!
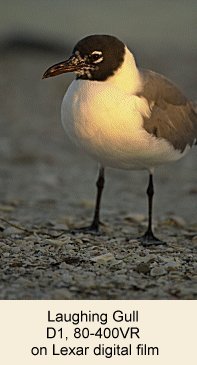 Gulls
& Terns. "Watch a gull for ten minutes and it will always
be doing something to photograph." My good friend Arthur Morris
always says this, and he's right. The problem is, most photographers
ignore "seagulls" (which is incorrect, they are gulls) because
they are just that, gulls. This is a major mistake! Gulls and terns are
great subjects well worth your time. Gulls
& Terns. "Watch a gull for ten minutes and it will always
be doing something to photograph." My good friend Arthur Morris
always says this, and he's right. The problem is, most photographers
ignore "seagulls" (which is incorrect, they are gulls) because
they are just that, gulls. This is a major mistake! Gulls and terns are
great subjects well worth your time.
I truly hope you're not wondering where to find a gull to photograph.
Terns can be more of a challenge since they migrate out of most of North
America in the winter. In either case, the spring and summer are the
best times to photograph these birds because that's when they are going
into or are in their breeding plumage. This is their best dress, which
makes for the best looking subjects for the best images.
Gulls and terns really don't require a whole lot of talent to get
close to them. You can't charge them like a bull in a china shop, but if
you walk up slowly to them, you can normally get real close quite easily
which means a 600mm lens is not required to capture the image! You can
photograph gulls and terns with a 400mm lens as long as you take your
time to get close.
 Why take
time to photograph these birds? First, because they are so easy to
photograph! Especially if you're new to bird photography, they are a
great subject to learn from. Getting close physically, exposure,
composition, light, can all be accomplished as they are simple subjects
that you can photograph over and over again by learning from previous
adventures. They are also a great bird to learn flight photography from. Why take
time to photograph these birds? First, because they are so easy to
photograph! Especially if you're new to bird photography, they are a
great subject to learn from. Getting close physically, exposure,
composition, light, can all be accomplished as they are simple subjects
that you can photograph over and over again by learning from previous
adventures. They are also a great bird to learn flight photography from.
Head to any nearby duck pond with ducks and gulls and you'll find
someone feeding them. With feeding occurring there is always action,
gulls always take flight and here's where you can learn and practice
panning. Some might be saying, "what a boring subject!" But I
beg to differ on that point!
 Gulls,
being social are by their very nature very interesting. They are also
very interesting by their biology. For example, there are some great
images out there where you can see down the red throat of a gull that
appears to be yawning. Many think this must be a real lucky shot to ever
capture when it actually just takes a little time. Gulls and terns
process the salt water they constantly are ingesting and the process
ends when the salt solution slowly drips from a small opening in the
bill. When this happens, which is usually once every ten minutes for
birds on the coast, the gull/tern opens their bill to expel it. If you
want the shot, you just put your time in, prefocus on the bird and wait!
(A little flash can help light up the inside of the throat if the light
is not good.) Gulls,
being social are by their very nature very interesting. They are also
very interesting by their biology. For example, there are some great
images out there where you can see down the red throat of a gull that
appears to be yawning. Many think this must be a real lucky shot to ever
capture when it actually just takes a little time. Gulls and terns
process the salt water they constantly are ingesting and the process
ends when the salt solution slowly drips from a small opening in the
bill. When this happens, which is usually once every ten minutes for
birds on the coast, the gull/tern opens their bill to expel it. If you
want the shot, you just put your time in, prefocus on the bird and wait!
(A little flash can help light up the inside of the throat if the light
is not good.)
 Since
you can get so close to gulls and terns, they are a great subject to use
for practicing getting close and taking headshots. Headshots are not as
easy as they seem since you must compose them properly to make them look
correct in the final image. You must also look for and work on the catch
light, which is really obvious when you're close physically. This can be
the whole image's impact if done correctly. It's much better to practice
on a subject like a gull than something really impressive like a hawk! Since
you can get so close to gulls and terns, they are a great subject to use
for practicing getting close and taking headshots. Headshots are not as
easy as they seem since you must compose them properly to make them look
correct in the final image. You must also look for and work on the catch
light, which is really obvious when you're close physically. This can be
the whole image's impact if done correctly. It's much better to practice
on a subject like a gull than something really impressive like a hawk!
One last barb (get it? barb, feather…?) Bird photography,
especially really great bird photography takes time. You might get lucky
every now and then, but producing a portfolio case full of awesome
images simply takes time, no way around it! I'm here to tell you that
you, every one of you can do it, without exception! With today's camera
equipment and all the information available, biologically and
technically, all you have to do is put in the time to master these two
essential elements of great bird photography. Take these basics I've put
forth here and start applying them to more and more bird species, and
soon you too will master bird photography! I hope to see you sometime
when you're out photographing birds because you know what they say…
birds of a feather…
 Subscribe to
VividLight Subscribe to
VividLight
Photography by email
|

