|
|
|
|
|
|
| Introduction to Digital
Photography by Frank Phillips There is still a lot of confusion surrounding digital cameras and digital photography. With all the new cameras and options it just seems to get more confusing instead of clearer. It is easier to approach something if you can take it in small bites. So in an effort to make digital easier to approach and understand I've grouped together everything you need to know to get started in ten easy to understand lessons.
Lesson 4: Sharing Your Photos using I recently received some correspondence from a reader saying that he has been scanning prints and then trying to email them, but that it took 30 minutes to upload the photo. What was he doing wrong? Actually he wasn't doing anything "wrong", he had simply skipped a critical step that is necessary before emailing a photo: he didn't resize it. When you shoot a photo with a digital camera, the file size is determined by the resolution of the image and the compression applied to it (as you learned in the previous two articles). So if you've shot a 3 megapixel image of a scenic lake and wish to email it to your friends, you sure don't want to send them a copy of the original image unless you want to get some hate mail in return.
The original image (in our 3 megapixel example here) is 2048 pixels wide by 1536 pixels tall, which would cover an area over 200% larger than the average computer monitor is capable of displaying (assuming the monitor is set to 1024x768). Another way of saying this is that if you open a 3 megapixel image on the typical monitor (no matter how big the monitor is), you will only see about 25% of it at its full resolution, leaving the other 75% of the image off-screen. So instead of sending an image this large, you'll want to resize that picture down into a more manageable file, one that will be completely visible on the screen (resolution) and one that will not take so long to send via email (file size). The image editing software that came with your digital camera should contain a resize function (just about all image editors do). When you resize an image, you simply reduce the height and width of the image so that it is smaller. This is great for emailing and posting on web pages, but not great for printing. Thus, you should keep one set of full-resolution shots for printing, and only resize copies of the ones you need to email or post on a web page. Make sure that when you resize an image, you first make a copy of the original and resize the copy. That way you always have the original. Resizing Made Easy The first is a "do it all" package called SendPhotos that sells for less than $30. It's worth every penny if you just want to email your photos. Essentially, it's a "hold your hand and walk you through it" product that lets you choose the photos you want to email, automatically resizes them, then bundles them into an email message ready for sending. It doesn't get much easier than this, especially for under $30. Here is how it works:
The second product I mentioned is an excellent FREE software product called PhotoResizer and you can download it free from my friend Piet Henning's website, ShowYourPhotos.com. This is about as easy as it gets; the image below is a screen shot from the PhotoResizer, which shows you step by step how to easily resize a digital photo.
How Big Should it Be? That's why I recommend resizing where the largest dimension is no bigger than 600 pixels. That way you're sure it will fit on anyone's screen, whether they're using a laptop or desktop computer. There's another benefit as well. In the example above, the photo of the lake, a 6 megapixel photo (3072 x 2048) was downsized to a 600 x 400 pixel photo with a file size of just 90 kilobytes. That's a file size reduction of over 3800%! And that means it will take much less time to email. So do yourself and your friends a favor: learn how to resize efficiently, and these two products can do all the work for you. What About Sharing Lots of Photos? If this is the case, you should consider using an internet-based "photo album". An online photo album is exactly what the name implies; it's an album, or series of albums, that you maintain online, and if you want, you can limit access to these albums by using passwords. So if you create an online photo album of your kids, you can simply email the photo album's link to your family and friends. There are no attachments, no slow uploads and downloads, no problem. They just click on the link! There are lots of choices for creating and maintaining online photo albums. I'll discuss three of them here. First, you can do what I do, and that is to maintain your own website with your photo albums or portfolios inside. If you have the software and experience, you can have your own website hosted for as little as $50 per year. This is the best option for us control freaks who insist on complete customization. Your second option is to use a pay service for hosting your online albums, such as pbase, photosig, or webshots. We're even adding online photo albums to Vivid Light in the next few months.
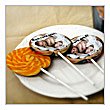
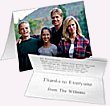
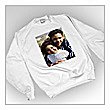
Your third option is to use one of the better online printing services, such as Club Photo. For $25 a year, you get a number of permanent online albums, and the people you allow to access these albums can also order prints from Club Photo, saving you the trouble and putting a little money in Club Photo's pockets (hey they're in business). A service like Club Photo can even print your photos onto mugs, cards, calendars - even onto chocolate photo lollipops - no kidding! Digital photography and the Internet give you so many ways to share your photos with your family, your friends and with the people you meet online. The best thing is that it gets easier and less expensive every day.
|
|
||||||||||||||||||
|
|
|
|
|
|
|
|
|