Back to Basics
by Gary W. Stanley
 Several years ago, I submitted about two hundred slides
to a stock agency in New York, having heard some good things about them.
I carefully edited my slides and sent them on their way. Even though I
felt fairly comfortable that they would like my work, I was admittedly
somewhat nervous about what they might say, or even the possibility of
rejection. Several years ago, I submitted about two hundred slides
to a stock agency in New York, having heard some good things about them.
I carefully edited my slides and sent them on their way. Even though I
felt fairly comfortable that they would like my work, I was admittedly
somewhat nervous about what they might say, or even the possibility of
rejection.
Like a shrewd fox, I called under the pretense of making sure the slides
had arrived okay. To my delight, the woman on the other end of the phone
told me that the contract was already in the mail back to me. Does that
mean you liked them? Was my next brilliant question. "We were
thrilled," she said. "In fact, it made our day."
What she
said next, however, was what really caught me by surprise. "It's so
refreshing to see good, sharp images."
What I had assumed was a given, was apparently not as
common as you might think. Hence, this is the very reason for this
article. No matter how long we've been photographing, the basics still
apply. Good technique and artistic vision go hand in hand, and a
back-to-basics refresher course is good for everybody.
Equipment Basics:
Here are the basics that you'll need to get started:
1. A camera with a depth of field preview button, an accurate metering
system and a provision for a cable release.
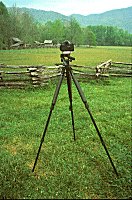
2. A sturdy tripod with a good tripod head. I prefer a tripod with legs
that will spread to allow a low-to-the-ground camera angle.
3. Quality lenses to fit your budget and subject matter. I happen to
prefer zoom lenses.
4. Sharp fine grain film with good color rendition, in either slides or
prints.
5. My basic filter kit consists of a polarizer, an 81A-warming filter,
and a graduated neutral density filter.
6. A nice comfortable compact backpack to make transporting your
equipment that much easier.
|
|
|
I've been working with
Hakuba carbon fiber tripods for the past two years and am very
pleased with their performance
|
Within the realm of nature photography, whether it is
landscape or wildlife, I feel that nothing justifies not using a tripod unless you've just thrown it on the ground in hopes of
out-running the moose that's chasing you.
Tripods are the single most
important piece of equipment designed to improve your photography,
period! Besides stabilizing your camera, it forces you to slow down
allowing you to double-check everything; from your focus, your
depth-of-field, distracting objects in the frame, and the impact of your
composition.
Remember, when you're looking through your viewfinder with a wide-angle
lens attached, objects will appear further away so it will be harder for
you to notice distracting objects. Take your eye away from the
viewfinder and inspect the area being photographed. Again, this is
another very good reason for using a tripod.
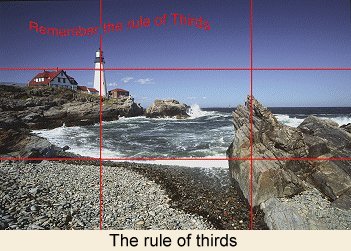
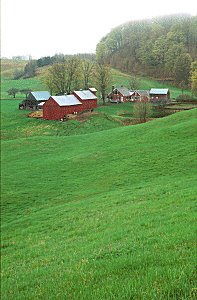
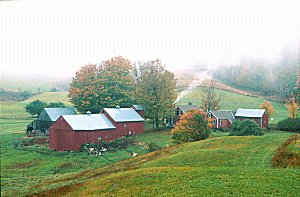
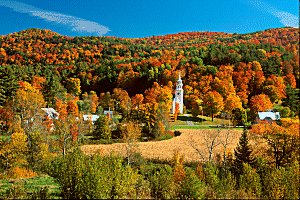
Using the rule of thirds in photography is the
first step to making your photos more interesting. Placing your horizon
line for example, in the upper or lower third of your composition can
place emphasis on either the foreground or the background. Dividing your
composition into thirds helps to avoid a static composition.
Your eyes will flow more easily through that composition.
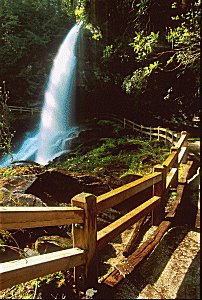
Finding a
foreground object to lead your eye through the composition
will also help improve your image and add scale and depth as well. This
is part of the basic design elements of line, shape, texture, and form.
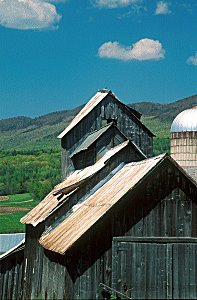
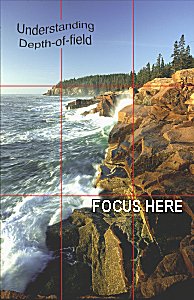 In nature or especially landscape photography, I'm generally trying to
have everything from foreground to background tack sharp in our
photograph. I usually stop the lens down to a small opening, say, f/16
or f/22. One easy way to assure maximum depth in your photograph is to
focus a third of the way into the scene. Not the actual
distance of the subject that you are photographing, but a third of the
way into your frame as you look through the viewfinder. Use your
depth-of-field preview button, to stop the lens down to its taking
aperture to visually check and see if everything looks sharp. Take your
time, and allow your eye to adjust to the darkened image in the
viewfinder. Remember again, an autofocus camera doesn't know that you're
looking for maximum depth of field, so focus manually.
In nature or especially landscape photography, I'm generally trying to
have everything from foreground to background tack sharp in our
photograph. I usually stop the lens down to a small opening, say, f/16
or f/22. One easy way to assure maximum depth in your photograph is to
focus a third of the way into the scene. Not the actual
distance of the subject that you are photographing, but a third of the
way into your frame as you look through the viewfinder. Use your
depth-of-field preview button, to stop the lens down to its taking
aperture to visually check and see if everything looks sharp. Take your
time, and allow your eye to adjust to the darkened image in the
viewfinder. Remember again, an autofocus camera doesn't know that you're
looking for maximum depth of field, so focus manually.
Choosing the right lens for a particular composition is another area
that is important to basic photography. The nice thing is, we can select
a lens, look through the viewfinder, and see if it gives us the results
that we're looking for. A wide-angle lens can be used to expand the
apparent distance between objects, and a telephoto can be
used to compress that apparent distance.
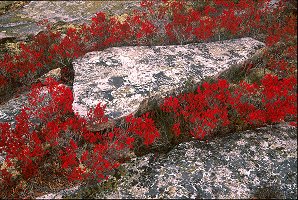
For filters, a polarizer is my hands-down favorite. Its ability to cut
reflections on foliage, water, and other reflective surfaces, makes it a
very useful tool.
It allows the natural beauty of
fall foliage for example, to come through in your photograph. A warming
filter adds a touch of warmth, warming some of the cooler subjects in
nature.

 You may also want to consider
a warm polarizer. These filters combine an 81A warming filter and
a polarizer into a single filter and they're available from most
manufacturers. You may also want to consider
a warm polarizer. These filters combine an 81A warming filter and
a polarizer into a single filter and they're available from most
manufacturers.
I also use graduated
neutral density filters (A four-inch square filter that is dark on the
top half, and clear on the bottom half). This filter allows you to
control the contrast range of your film, especially slide film. I use it
when I'm trying to expose for the subject in the foreground and want to
maintain the deep rich color of a sunset, or the sky for example. I
carry both the one stop, and two stop grads.
Last, but certainly not least, is everyone's favorite problem - exposure.
How do we get correct exposure? Thankfully today's cameras, with their
sophisticated evaluative metering systems, have taken a lot of the
guesswork out of it. I still feel, however, that a basic understanding
of what a camera's meter is trying to do will go a long way towards
helping you to attain correct exposure. Remember, your camera's meter is
trying to make everything you point it at medium in tonality, neither
light nor dark, but somewhere in the middle. Since much of what we
photograph in nature is medium in tonality, we're off to a good start.
All you have to do is meter something in the same light as your
subject;. something that's medium in tonality, like green foliage, dry
tree bark or gray rocks, and use that as your starting point.
 When your subject is not medium, all we have to do is adjust our
exposure according to what tonality it really is. Ask yourself; how much
lighter or darker than medium is our subject? If it's dark red, and we want it to appear that way on film, adjust the exposure by
the amount that you feel will work to make it dark red. For example; an
adjustment of one stop darker (subtract light) than the camera's
suggested reading of medium, will make it dark red, two stops would be
very dark red.
When your subject is not medium, all we have to do is adjust our
exposure according to what tonality it really is. Ask yourself; how much
lighter or darker than medium is our subject? If it's dark red, and we want it to appear that way on film, adjust the exposure by
the amount that you feel will work to make it dark red. For example; an
adjustment of one stop darker (subtract light) than the camera's
suggested reading of medium, will make it dark red, two stops would be
very dark red.
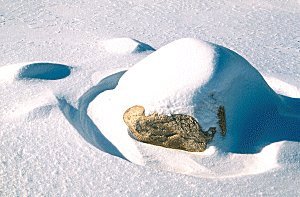 If you're metering snow on a bright day, and you want the snow to be
white, not gray, you would ignore your camera's meter reading and open
up (add light) about a stop and a half to a stop and two thirds, to
retain some detail in the snow. Please keep in mind, that
some of these new metering systems may be programmed to take these
situations into account (Fuzzy Logic). I will usually switch to spot or
center weighted metering, cross-reference that reading, using the above
method and see if I get the same answer.
If you're metering snow on a bright day, and you want the snow to be
white, not gray, you would ignore your camera's meter reading and open
up (add light) about a stop and a half to a stop and two thirds, to
retain some detail in the snow. Please keep in mind, that
some of these new metering systems may be programmed to take these
situations into account (Fuzzy Logic). I will usually switch to spot or
center weighted metering, cross-reference that reading, using the above
method and see if I get the same answer.
If this method sounds familiar, John Shaw talks about this in-depth in
his latest book from Amphoto called, John Shaw's Nature Photography
Field Guide.
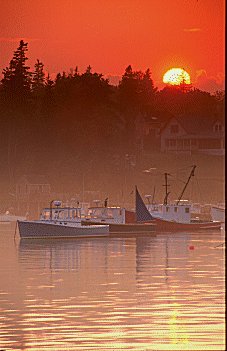
 As a final point, remember this: Lighting is everything! All of the tips
in this article will help you improve your photography, but it's
lighting that will make it dynamic.
As a final point, remember this: Lighting is everything! All of the tips
in this article will help you improve your photography, but it's
lighting that will make it dynamic.
In conclusion, using good technique, understanding the basics of good
composition and exposure, and of course lighting, are all important
steps to producing good photographs. Getting out and practicing the
things you've learned will make the biggest difference!
 Subscribe to Vivid
Light
Subscribe to Vivid
Light
Photography by email
|

|
|