|
|
|
|
|
|
|
Exposure:
Get It Right The First Time - Part II by Gary W. Stanley Two years ago when I first wrote on the subject of correct exposure, all we were basically dealing with were film cameras (see Exposure: Get It Right The First Time in Issue #14). My intro to the program or article went like this: If I took a survey of any ten photographers and asked them what area of photography gives them the most problem, more often than not, they would say exposure. It doesn't seem to matter what camera or camera system we have, we still have problems understanding how to get correct exposure with our camera's built-in metering system. The problem is many photographers don't know how to properly interpret their camera's metering suggestions.
As I experimented and learned more about my digital camera, I was surprised at how similar it was to a film camera and yet at the same time how different they were. I found that I was still in control of exposure with aperture, shutter speed, program and manual settings. I could focus manually or use auto-focus. I had interchangeable lens, hey, this isn't that scary after all. There were a few critical differences between my Nikon F100 film camera, and my Nikon D100 digital camera. I have custom Menu Settings, the LCD panel, White Balance, and I use a compact flash card instead of film in the D100. Now I was asking myself if the same basic rules apply to both digital and film when trying to achieve correct exposure. Well for the most part the same rules do apply. In tricky lighting situations, you may not be able to trust the settings your camera has chosen. You start to second-guess yourself every time you take a photograph. "Let's see, when I have a subject on a white sandy beach, should I open up or close down from the suggested reading?" You begin to bracket your shots thinking that if you make enough different exposure selections, you're bound to get one right.
With digital you do have greater exposure latitude than with slide film (similar to print film), close to seven stops from your deepest blacks to your whitest whites. With slide film you're pushing it to get five stops of exposure latitude from washed out whites to blocked-up blacks. I realize that up to this point you're probably feeling like this is a film versus digital discussion, but it really isn't. Given digital's popularity of late, I feel it necessary to lay some ground work for these two methods of capturing images and how we go about getting correct exposure for both. In traditional photography, you certainly don't want to waste film and money guessing. So it makes more sense to learn how to get correct exposure the first time. Let's quickly review five basic terms associated with getting correct exposure.
Now that we have a simplified definition of what goes into the process of obtaining correct exposure, let's look at the two basic types of traditional 35mm exposure systems and the digital method of obtaining an exposure. Center-weighted Metering: Most older cameras such as the Minolta X700, Canon AE-1, Nikon FE, Nikon FM and Pentax K-1000s use center-weighted metering systems. Center-weighted metering systems concentrate most of the meter's sensitivity toward the center of the viewfinder (usually about 60% of the meter is weighted toward the center area) to give you an average exposure. This average is based upon the meters ability to render a medium-toned subject as medium. 18% gray has been this standard, being neither light nor dark but average in tonality. The reasoning behind this is that about seventy-five percent of most subjects in nature, or in normal picture taking situations, are medium in tonality. Evaluative Metering: While still using 18% gray as a standard for metering reference, the newer generation of 35mm cameras, such as the Canon EOS series, Nikon's newer F, and N series, Minolta's Maxxums and the Pentax ZX series, all use an 'evaluative' type metering system. Each uses a different name for their system, i.e. Matrix, Honey-Combed, Evaluative, Multi-Zoned etc. Basically they are all designed to do the same thing: they break the camera's metering evaluations into separate zones (measuring both shadows and highlights). They take readings from those zones to evaluate the overall scene, and based upon input from the camera's computer, give what it feels will be the correct exposure for that particular shooting situation. Because of this type of metering system, exposure accuracy has increased to the point where in-camera meters are, in fact, very good. These cameras also contain the original center-weighted metering method as well as spot metering. Spot metering being a more sensitive area than center-weighted (similar to a handheld 1º spot meter). Current digital cameras use the same evaluative type metering systems as film cameras and most digital SLRs offer center weighted and spot metering. There is however one major difference in how a digital camera meters verses how a film camera meters. A digital camera uses white balance as a metering reference, instead of 18% gray. It wants to make a white subject white, while the film camera wants to make a medium toned subject medium, or 18% gray.
I recently compared meter readings between my Nikon F100 and the D100, and in most cases they either metered identically or were within a third of a stop of each other. Each camera was rated at 200 ISO, using identical lenses, and tested in general outdoor shooting situations. I also compared the readings taken from both a gray card and the reversed white side, and they were the same as well. Okay. Let's talk as though we have evened the playing field here between the two types of image capturing methods. You still need to be in control of the process. Don't let the camera always decide what exposure is best because it may not always be right, nor will it always know what you are trying to do. The camera and its metering system, no matter how good or high-tech, or whether you're shooting digital or film, is just a tool, there to help you with your exposure decisions. If you learn how to interpret your in-camera's metered suggestion properly, your chances for success will be much greater. How do we get that meter reading? Using your center-weighted or spot metering system, let's give you three easy ways to get correct exposure. At this point, we are basically talking about a front-lit subject. These steps are the same regardless of whether you using film or digital.
Okay, what do you do when you're photographing a subject that is not middle toned, or medium? Experience Helps: I had to learn what a medium toned subject looked like. At a workshop I attended back in 1988, John Shaw reminded the group that we are first of all working in color, not black and white. So, forget the term medium gray. It's the subject's tonality that we are interested in. So we would play a little game where we would look around the room and identify subjects by their tonality. Is John's blue shirt medium in tonality? If not, is it lighter or darker than medium? Okay, it's lighter; how much lighter than medium blue is it? A half stop? A full stop? Jane's sweater, is it medium yellow? If not, is it lighter or darker than medium? Okay, darker, but how much darker? We played this game until we had a pretty good idea whether or not a subject, not based on color, was in fact medium in tonality, lighter or darker. Then, how much light should be added or subtracted, if any, from the exposure we would make in order to keep that subject's original tonality. When shooting out in nature I use the same approach. If I meter something such as light yellow leaves, my in-camera meter will want to place them as medium yellow. So if I choose to keep them light yellow, I will add one stop more light to my exposure. If I'm exposing for the white area of a waterfall in bright even light, I know that I will need to open up from my camera's suggested reading at least one and a half to one and two thirds stops so the white water will be recorded as white instead of gray.
One more tip: If you meter a medium toned area as medium, the whites will be white and the blacks will be black. If your subject is white or black you may wish to add or subtract a little light to maintain detail in those subjects. "Wait a minute Gary, that was great when I owned my old camera system, but now my new camera has an 'evaluative' meter with something called 'Fuzzy Logic' that says to itself, Hey! I've taken a shot like this before and I already know that I have to add or subtract light to get correct exposure. Now what?" I'd say try it! As good as today's meters are they aren't foolproof. How do you know that it will handle every situation the way you want? Besides trial and error, you can do what I do: Cross-reference yourself by using your camera's built-in spot or center-weighted meter the same way that you would have with your old system, and see if you get the same answer. In practice this doesn't take as long as you might think. Conclusion: Getting correct exposures boils down to your taking control of the photographic process, understanding how your camera wants to render the shot, and then deciding if that is what you want or whether there is a need to fine tune the exposure. Above all, have fun, take your time, and enjoy the learning process knowing that in the end, it will make you a better photographer.
|
|
|
|
|
|
|
|
|
|
|
 Well
now, as you all know, we have added digital photography to the mix. When I
purchased my first digital camera, I used it more as a point-and-shoot
camera rather than a full fledged SLR. I set up my camera using fairly
standard settings, figuring that I would at the very least be in the ball
park. I captured some nice images using this set-up but soon realized that
if I was going to consistently capture the kind of images that I had
captured with my film camera I had better learn how this camera is supposed
to work.
Well
now, as you all know, we have added digital photography to the mix. When I
purchased my first digital camera, I used it more as a point-and-shoot
camera rather than a full fledged SLR. I set up my camera using fairly
standard settings, figuring that I would at the very least be in the ball
park. I captured some nice images using this set-up but soon realized that
if I was going to consistently capture the kind of images that I had
captured with my film camera I had better learn how this camera is supposed
to work.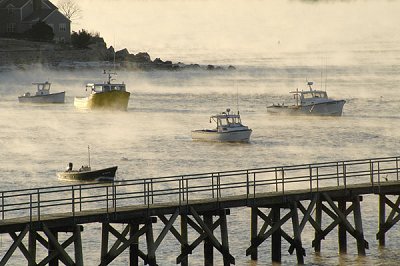 You
may think that this isn't a big problem when shooting digitally, because you
can always review the image on your LCD screen, and delete what you don't
like. But don't assume that your LCD is accurate, especially when using it
to judge correct exposure. You can use the LCD to check your composition or
perhaps the histogram and see where the exposure is falling, but my advice
to you is to use the standard camera viewfinder and meter the same as you
would when using a film camera.
You
may think that this isn't a big problem when shooting digitally, because you
can always review the image on your LCD screen, and delete what you don't
like. But don't assume that your LCD is accurate, especially when using it
to judge correct exposure. You can use the LCD to check your composition or
perhaps the histogram and see where the exposure is falling, but my advice
to you is to use the standard camera viewfinder and meter the same as you
would when using a film camera.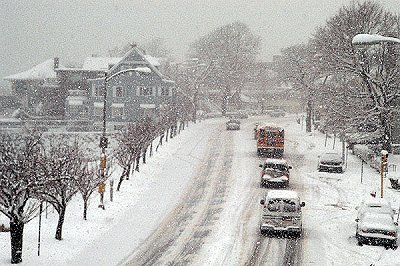 Wow!
A big difference here, or is it? While the camera's metering methods may
differ with digital and film, you determine exposure the same way for either
system. How a film camera or a digital camera goes about getting an exposure
isn't as important as coming up with the same answer. White balance and its
related settings are there for reasons other than just getting correct
exposure. With a film camera you change the type of film in order to match
the type of light you're photographing in. With a digital camera you
adjust the white balance to match the light that you're shooting in.
Wow!
A big difference here, or is it? While the camera's metering methods may
differ with digital and film, you determine exposure the same way for either
system. How a film camera or a digital camera goes about getting an exposure
isn't as important as coming up with the same answer. White balance and its
related settings are there for reasons other than just getting correct
exposure. With a film camera you change the type of film in order to match
the type of light you're photographing in. With a digital camera you
adjust the white balance to match the light that you're shooting in. What
do you do if your gray card or hand cannot be held in the same light as your
subject (maybe you are under a shade tree)? Well, you could take a spot
meter reading metering off your subject without the meter being influenced
by other areas of light. Then recompose and shoot.
What
do you do if your gray card or hand cannot be held in the same light as your
subject (maybe you are under a shade tree)? Well, you could take a spot
meter reading metering off your subject without the meter being influenced
by other areas of light. Then recompose and shoot. You
can use the same approach for very light or white subjects such as snow,
where I will open up (add light) from the camera's meter reading by about a
stop and two thirds in bright sunlight (to maintain some detail in the
snow), to maybe only a stop in overcast light. For very dark or black
subjects like Buffalo I will stop the lens down a stop and a half or so
(again, depending on the light) to maintain detail in the fur. Remember:
you're exposures are always going to be influenced by amount of light
falling on the subject, the direction of the light and whether your subject
is reflecting light or not. Anything that you feel may be inflating or
influencing a true meter reading, may need to, and can be adjusted. You can
meter any subject and place it at whatever tonality you wish, it's your
choice. Now you are in fact in control of the exposure process.
You
can use the same approach for very light or white subjects such as snow,
where I will open up (add light) from the camera's meter reading by about a
stop and two thirds in bright sunlight (to maintain some detail in the
snow), to maybe only a stop in overcast light. For very dark or black
subjects like Buffalo I will stop the lens down a stop and a half or so
(again, depending on the light) to maintain detail in the fur. Remember:
you're exposures are always going to be influenced by amount of light
falling on the subject, the direction of the light and whether your subject
is reflecting light or not. Anything that you feel may be inflating or
influencing a true meter reading, may need to, and can be adjusted. You can
meter any subject and place it at whatever tonality you wish, it's your
choice. Now you are in fact in control of the exposure process.