
|
|
|
|
|
|
|
Exposure:
Get It Right The First Time
By Gary W. Stanley If I took a survey of any ten photographers and asked them what area of photography would they say gives them the most problem, more often than not, they would say exposure. It doesn’t seem to matter what camera or camera system we have, we still have problems understanding how to get correct exposure with our camera’s built-in metering system. The problem usually exists because we don’t know how to properly interpret our camera’s metering suggestions. In more tricky lighting situations, you may not be able to trust the settings your camera has chosen. You start to second-guess yourself every time you take a photograph. “Let’s see, when I have a subject on a white sandy beach, should I open up or close down from the suggested reading?” You begin to bracket your shots thinking that if you make enough different exposure selections, you're bound to get one right. This is not a problem when shooting digitally, because you can review the image on your LCD screen. It’s also not a problem if you are blessed with a bank account like Bill Gates. But if it more closely resembles my bank account, you might want to continue reading. In traditional photography, you certainly don’t
want to waste film and money guessing.
It would make more sense to learn how to get correct exposure the
first time. Let’s quickly
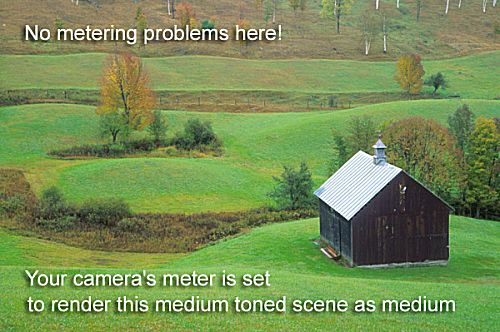
review five basic terms associated with getting correct exposure. 1. Exposure: When light is allowed to pass through the lens, and through the opened shutter curtain in the camera, you have exposed light to the film. The amount of light you allow to reach the film is a result of two basic functions, aperture and shutter speed; both play a part in creating an exposure. 2. Aperture: The size of the opening in a lens through which light passes is controlled by the Aperture setting. It controls the volume of light transmitted to your film, in terms of stops such as f/2.8, f/4, f/5.6, f/8 and so forth. 3. Shutter-Speed: The duration of time that the shutter curtain is open in your camera, allowing light to hit the film. This is reflected in the fractional term such as, 1/30th of a second, 1/60th, 1/125th, 1/250th and so forth. Simply put, with regard to light reaching the film, the aperture controls how much; the shutter speed controls how long. 4. Correct Exposure: The proper combination of aperture and shutter speed, to get the results you desire. 5. Bracketing: The over or under exposing of the camera’s metered choice for correct exposure. How much or how far you bracket is up to you, i.e., 1/3, 1/2, or 1 full stop, for example. Now that we have a simplified definition of what goes into the process of obtaining correct exposure, let’s look at the two basic types of 35mm exposure systems currently on the market. Center-weighted: Most older cameras such as the Minolta X700, Canon AE-1, Nikon FE, Nikon FM and Pentax K-1000s use center-weighted metering systems. Center-weighted metering systems concentrate most of the meter’s sensitivity toward the center of the viewfinder (usually about 60% of the meter is weighted toward the center area) to give you an average exposure. Evaluative Metering: The newer generation of 35mm cameras, such as the Canon EOS series, Nikon’s newer F and N series, Minolta’s Maxxums and the Pentax ZX series, all use this 'evaluative' type metering system. Each manufacturer calls them by different names, i.e. Matrix, Honey-Combed, Evaluative, Multi-Zoned etc. They basically are designed to do the same thing: they break the camera’s metering into separate zones. Then, they take readings from those zones to evaluate the overall scene, and based on input from the computer, give what it feels will be the correct exposure for that particular shooting situation. Because of this type of metering system, exposure accuracy has increased to the point where they are, in fact, very good. These cameras also contain basic center-weighted metering as well as spot metering, with spot metering being a more sensitive area than center-weighted (similar to a 1º spot meter). However: You need to be in control of the process. Don’t let the camera always decide what exposure is best because it may not always be right, nor will it always know what you are trying to do. The camera’s metering system, no matter how good or high-tech, is just a tool, there to help you with your exposure decisions. If you learn how to interpret that metered suggestion properly, your chances for success are much greater as you will soon see. With the older generation of 35mm cameras, your center-weighted meter was designed to render an average subject as a medium tonality, not light or dark, but in the middle. Because approximately 75% of everything we point the camera’s meter at is medium in tonality (green grass, blue sky, gray rocks, etc.), exposures seem to be okay in those shooting situations. So if what we are metering is in fact medium in tonality, we are fine; just compose and shoot. How do we get that meter reading?
With a center-weighted or spot metering system, let’s give you three easy ways to get correct exposure. At this point, we are basically talking about a front-lit subject.
What do you do if your gray card or hand cannot be held in the same light as your subject (maybe you are under a shade tree)? Well, you could take a spot meter reading.
Okay, what do you do when you’re photographing a subject that is not middle toned, or medium? Experience Helps: I had to learn what a medium toned subject looked like. At a workshop I attended back in 1988, John Shaw reminded the group that we are first of all working in color, not black and white. So, forget the term medium gray. It’s the subject’s tonality that we are interested in. So we would play a little game where we would look around the room and identify subjects by their tonality. Is John’s blue shirt medium in tonality? If not, is it lighter or darker than medium? Okay, it’s lighter; how much lighter than medium blue is it? A half stop? A full stop? Jane’s sweater, is it medium yellow? If not, is it lighter or darker than medium? Okay, darker, but how much darker?
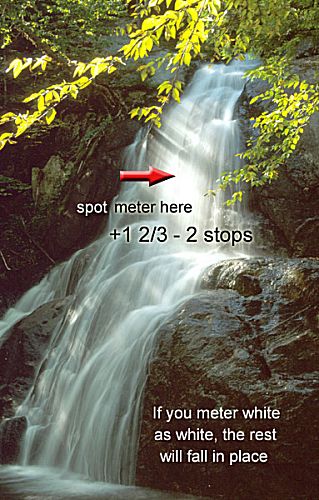
We played this game until we had a pretty good idea whether or not a subject, not based on color, was in fact medium in tonality, lighter or darker. Then, how much light should be added or subtracted, if any, from the exposure we would make in order to keep that subject’s original tonality? So when shooting out in nature, I use the same approach. If I meter something such as light yellow leaves, my in-camera meter will want to place them as medium yellow. So if I choose to keep them light yellow, I will add one stop more light to my exposure. If I’m exposing for the white area of a waterfall in bright even light, I know that I will need to open up from my camera’s suggested reading at least one and a half to one and two thirds stops so the white water will be recorded as white instead of gray. Remember: you can meter any subject and place it at whatever tonality you wish. That is, in fact, creative control.
Basically, I'd say use it! However, as good as they are, they aren’t foolproof. How do you know that it will handle every situation the way you want? Besides trial and error, do what I do, cross-reference yourself by using your camera’s built-in spot or center-weighted meter the same way that you would have with your old system. Meter something in the scene in the same light as your subject, preferably something middle toned, and see if you get the same answer. In practice this doesn't take as long as you might think.
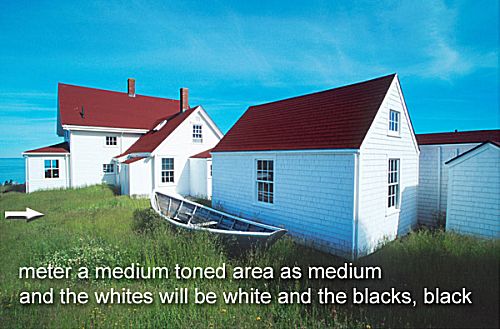
One more tip: If you meter a medium toned area as medium, the whites will be white and the blacks will be black
Conclusion: |
|
|
|
|
|
|
|
|
|
 But if your camera does not have spot metering, then what?
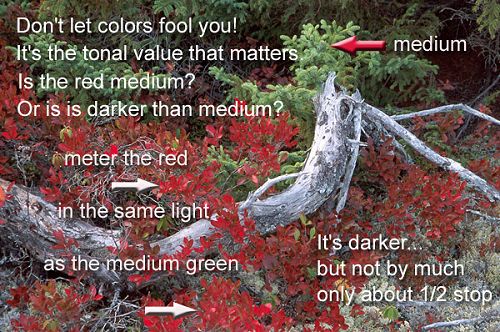
 “Wait a minute Gary, that was great when I owned my old
camera system, but now my new camera has an 'evaluative' meter with
something called 'Fuzzy Logic' that says to itself, Hey! I've taken a shot
like this before and I already know that I have to add or subtract light
to get correct exposure. Now what?”
“Wait a minute Gary, that was great when I owned my old
camera system, but now my new camera has an 'evaluative' meter with
something called 'Fuzzy Logic' that says to itself, Hey! I've taken a shot
like this before and I already know that I have to add or subtract light
to get correct exposure. Now what?”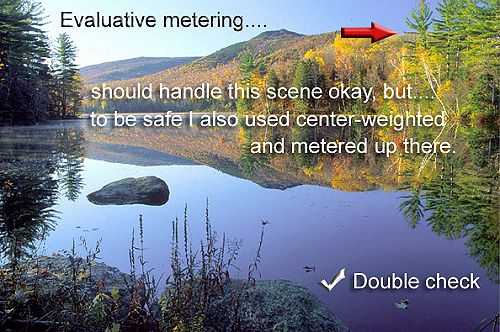
 .
.