|
page 12 of 22 |
|
page 12 of 22 |
| Shooting Active Pets by Jim McGee
If the racks of prints in your local mini lab hold any clue about the interests of photographers it's that people like to take pictures of kids and pets. The problem, as one lab tech recently told me, is that "so many of them really suck!". So how can you get pictures of your precious pets that don't suck? Really it's the simple things that make a big difference. So while Moose Peterson was out shooting those big cuddly Grizzly bears last month I was braving some really fierce creatures to shoot this article. Get Close Leave the Camera in the Bag What Lens and film? A minute ago I mentioned that there was no magic lens for shooting your pets, but there is a magic aperture. You want to shoot wide open (smallest numbered f-stop) so that you can blur the background. This out of focus background will make your subject "pop" out from the background, making them appear sharp and dominant in the final image. The good news is that you don't need super fast pro lenses to do this. All these images were shot with relatively inexpensive lenses (you can see the details on the equipment and film used by placing the mouse over the image). By the way, don't spare the film. A lot of getting great action pictures is timing. Some of the shots I thought I nailed didn't come out because of blur, background, light, etc. Shoot a couple of rolls and you'll know you've got some keepers.
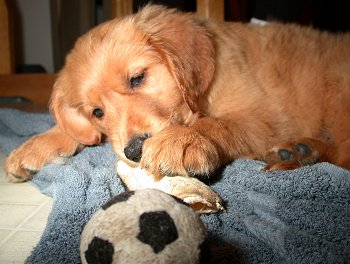
Getting the Images Get down to their level. Shots looking down at pets tend to be boring. Shoot the world from their level and they take on greater importance in the image. Get down lower and take some shots where they tower over you and you may be pleasantly surprised by the results. Just be quick with your camera. Dogs in particular explore new things by tasting them. More then once I've had my lens licked!
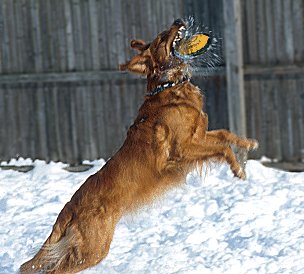
For the snow shots here I staked out a spot in the yard and had someone throw a ball and a Frisbee to a predetermined spot. I prefocused on that spot to minimize the focus time to catch the dogs at the top of their leap. Whether you need to do this depends on the camera and lens combination you're using. I picked up the habit years ago shooting with manual lenses. It's an equally good idea if your camera is a little slow to focus. However if you've got one of the newer cameras that focus quickly and track a moving subject you may do better panning with the subject and let the camera take care of the details. An important rule of thumb is don't take your eye away from the viewfinder when you're shooting. If you wait to see the shot with a moving subject you've already missed it. Unless you've done a lot of action photography with your camera it will take a few shots to get your timing down. On most cameras there is a short delay from the time you press the shutter to the time the camera fires. To catch the animal at the top of it's leap you'll have to time it so that you're leading them when you press the shutter so that it's always open at the top of the leap. This sounds harder then it really is. With a little patience and practice you can get it almost every time. It's also a good idea to use "continuous" mode if your camera has it so that it fires as long as the shutter is depressed. This helps with timing if you're not sure. Light Once you've run them into the ground and they're tired it's time for some posed shots. You'll have to hurry though as their motors recharge pretty fast. Position them so that the sun is at their back and to one side. This "hair light" or "rim light" will highlight the details of their fur enhancing the apparent sharpness of the image. Keep that Camera Loaded and at Your Eye
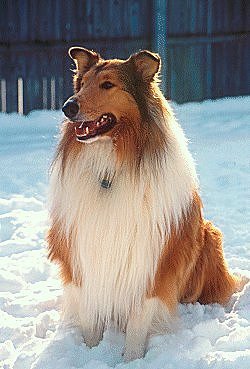
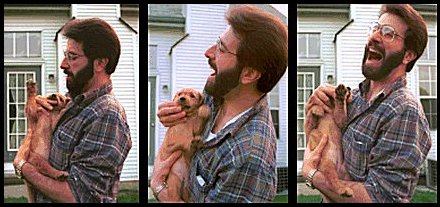
Keep in mind that some animals are camera shy. They don't understand that big black thing making the clicking noises so they try and get away from it. If this happens don't try and force it. All that will happen is that both of you will get frustrated.
If you really need that close-up with a shy animal there is one last trick you can try. I've gotten more then one dog portrait with a biscuit hanging under my lens! Special thanks to Andy & Pat DiPietro for providing several large goofy dogs for this article.
|
|
|
text and photography copyright © 2001 Vivid Light Publishing |
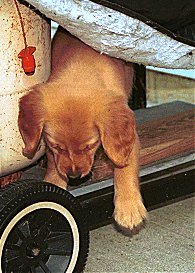
 How close should you get?. Fill the frame. When you put the picture on your wall
folks will want to see your beautiful dog - not your new couch.
Ignore this tip at your peril, otherwise, years from now, people will look at the photo and laugh at your
furniture. Don't believe me? Look at any indoor photo from the
70's!
How close should you get?. Fill the frame. When you put the picture on your wall
folks will want to see your beautiful dog - not your new couch.
Ignore this tip at your peril, otherwise, years from now, people will look at the photo and laugh at your
furniture. Don't believe me? Look at any indoor photo from the
70's!

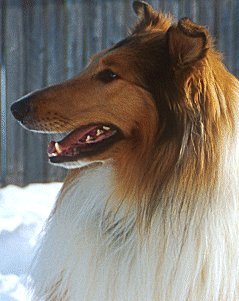
 As with most types of photography the best time to shoot is morning and
early evening when the sun is low on the horizon and the light is soft
and warm. I took some shots in open shade as I was a
little worried about glare off the snow (even with a polarizer). I
shouldn't have worried. The shots in the open have the best color
and are far more vibrant then those in the shade. A polarizer is
highly recommended as it will reduce the reflections off their coats and deepen their colors.
As with most types of photography the best time to shoot is morning and
early evening when the sun is low on the horizon and the light is soft
and warm. I took some shots in open shade as I was a
little worried about glare off the snow (even with a polarizer). I
shouldn't have worried. The shots in the open have the best color
and are far more vibrant then those in the shade. A polarizer is
highly recommended as it will reduce the reflections off their coats and deepen their colors.
 Instead
fit your long lens, back up and lay in the grass for a
while. If you're not crowding the animal they'll eventually settle
down and ignore you. That's when you can get your pictures.
Instead
fit your long lens, back up and lay in the grass for a
while. If you're not crowding the animal they'll eventually settle
down and ignore you. That's when you can get your pictures.