|
|
|
|
|
|
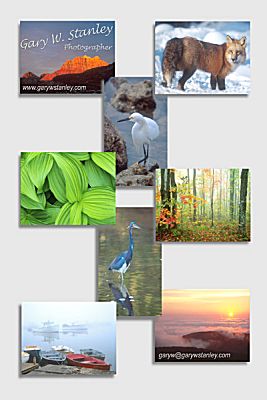
| Digital Darkroom: Fun with PhotoShop by Gary W. Stanley
Well I think I went through that curve with Photoshop maybe five or six years ago and I'm not even close to having it all figured out. Yes, there is the 'read the manual approach' and other various ways to learn. I happened to have friends who were Photoshop literate who I could question and whose equipment I could play with. I got set up with my own system during the course of those five years and began to play. I bought a film scanner, I added more memory to my computer, then, purchased a printer and a CD burner. While I certainly have come a long way, it has been only with those parts of the program that interested me or pertained to my business. I certainly don't have the time or the interest to learn every feature or to become a graphic designer. All I really want to do is have "Fun with Photoshop." I don't want to tax my brain that much, because I really can't afford to (my brain capacity is pretty limited). I just want to be able to produce a promo piece for my seminars, business cards, or print some of my images to show people. Well over the course of five or six years, I have been able to do that. I have found ways to educate both myself and others, either by reading or by experimentation. Gee Gary what do you mean experimentation?
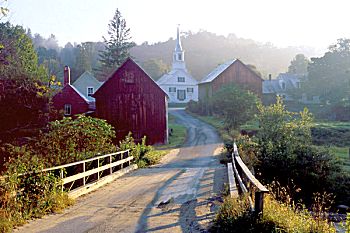
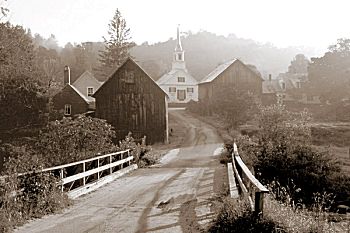
It has been this well thought out scientific "method of madness" that has brought me to this article. I have played around enough now to share with you ways to have fun with Photoshop. You are limited only by your own warped sense of humor (present company included), or your own creative genius, you decide. I'll show you what I mean. Some of the things that I have done are as simple as converting a color image to black and white (see printing "Black and White" March '02) or to a sepia toned image. Beyond that, there is an amazing amount of tools available through Photoshop that will convert an image to everything from a reflection to a watercolor painting. The most obvious thing that you have to be willing to do is play.
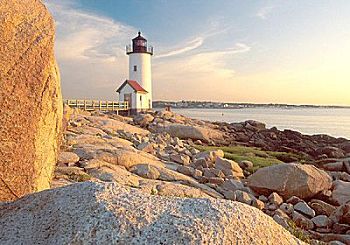
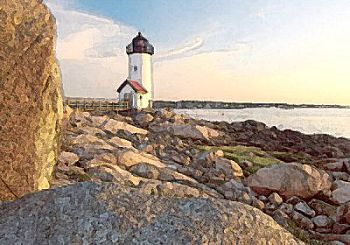
Pick out images that you feel might work well as an abstract painting. Ask yourself how would this shot of the False Hellebore look behind glass? Or the shot of Annasquam Light, created with the Fresco tool. I have been amazed at the different results that this program can create.
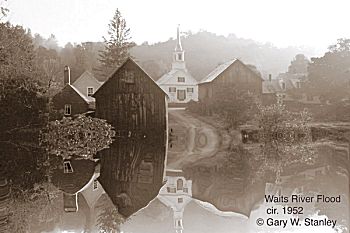
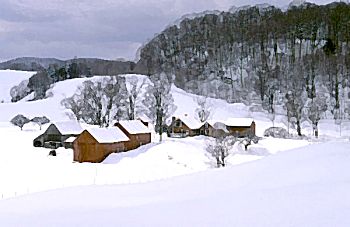
My first tip: Keep in mind that Photoshop needs a fair amount of memory (at least 128 mg) to operate well. Also if you start with an image saved as a JPEG, it will open and convert faster than, say a TIFF file. Second Tip: Pick the image that you want to play with, then across the top of your menu bar select Filter then scroll down to Artistic and pick a desired affect. You will get a preview of what it should look like, but wait until after you convert the image to see if it looks the way you want it to. If not, go to Edit, then scroll down to Fade to reduce the amount of the affect until it looks good to you. Third Tip: When you are in the menu selection called Filter, you have many more choices than just Artistic, so give them a try. Again, as you experiment more, you will begin to recognize which images will work well with what effects. The Reflection tool for example can be found by going across the menu bar (Photoshop 7.0) to Filter then scroll down to Liquify. Make sure the image you want is already open when you select Liquify. It will open its own window with several tool options along the left side of the window. As you scroll down that left side a pop-out menu will tell you what they are. Pick Reflection, and a pop-up on the other side will show settings. You choose the brush or tool size that you want, and your ready to begin (in Photoshop 6.0 Liquify is found under Image). Forth Tip: Start at the right side of your image down where you want the reflection to start, then drag the brush right to left in even strokes. When you reach the left side of your image stop the dragging process and start another row on the right side again just below the first row, then drag to the left again. Another words: don't drag back-and-forth across the image or it won't work. Try a fairly large brush to see how it will look. If you don't like the way it looks, select Revert below the brush selection menu on the right and start again. Okay, earlier in the article I mentioned two words, creative and warped. Please allow me to demonstrate. For example, after I did the "Flood of '52" reflection shot of Waits River Vermont I realized that this reflection tool could be used in other applications.
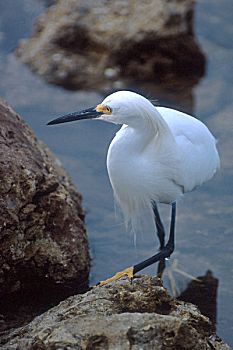
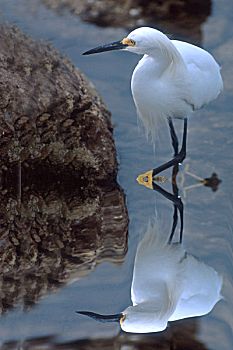
Fifth Tip: The reflection for the Egret was a little trickier to do. Under Image across the menu bar I selected Canvas size and created a canvas size that was larger (8x10) than the actual image size (4x6), and clicked on one of the upper squares to place the image there. This gives me an area of workspace below the bird with which I can create the reflection for the Egret. Follow the steps mentioned above to create the reflection and your almost done. Now that you have the reflection, you probably want to resize or crop the image back to 4x6. I simply cloned similar areas of the image using the rubber stamp tool to fill in the blank areas created after I cropped back to 4x6. Hopefully you have done this type of rubber stamp cloning before since this is a commonly used tool. That was the creative part, now finally the warped part. When this evil scientist began experimenting with his own children I new that I was destined for fame and fortune (or the penitentiary, this is child abuse - ed.). Using several tools under Liquify in the Select menu, please allow me to introduce my version of Jay Leno's Kids.
I hope that you laugh as hard as I did when you try this for the first time. I am a firm believer in keeping the fun in photography, and for me having "Fun with Photoshop" is just another way to keep on doing it. Look for Gary's review of Photoshop
7.0 in |
|
|
|
|
|
|
|
|
|
 As
with any new computer program, the learning curve can be difficult. At
first we get excited when we read about all the features and how it will
make our lives easier. The company touts its virtues and how user friendly
it is. They send us a demo and wow! This is cool!
As
with any new computer program, the learning curve can be difficult. At
first we get excited when we read about all the features and how it will
make our lives easier. The company touts its virtues and how user friendly
it is. They send us a demo and wow! This is cool! Well,
don't tell anyone, but sometimes I use the trusted: "I wonder what
this does?" approach to learning. I tend to be a shoot from the hip
kind of guy anyway. My partner Pam reads everything when loading a new
program and methodically follows things step by step. I read just enough
to get by. After all I'm supposed to be the creative one in the family,
right?
Well,
don't tell anyone, but sometimes I use the trusted: "I wonder what
this does?" approach to learning. I tend to be a shoot from the hip
kind of guy anyway. My partner Pam reads everything when loading a new
program and methodically follows things step by step. I read just enough
to get by. After all I'm supposed to be the creative one in the family,
right?