|
|
|
|
|
|
| Understanding Curves and Levels by Gary W. Stanley I am currently doing a series of seminars across the country for some of my sponsor's; it's called 'From Picture to Print'. It basically covers how to go from a quality 35mm slide to a high quality ink-jet print by way of a film scanner and a computer without a lot of heavy brainwork. We talk about the importance of a good starting image, a good scan, and what to do with the image to get it ready for printing. For those of us interested in this sort of thing, it is a nice starter program designed to get your feet wet without a great deal of pain. If you are like me however, it doesn't take too long to realize that you can go a lot farther with the process if you do a little R&R (reading & research). Take the actual pre-scan or adjustments made after the scan in a program like Photoshop for example. If you're like me, you probably skipped all the heavy reading of these programs, in favor of the learn-as-you-go method. While that works for a while, at some point we all have to break down and read the MANUAL. At first it was easy for me to make adjustments (though not always to my liking) to a slide (either in the pre-scan or Photoshop) by logically clicking on a button or menu selection that looked or sounded similar to what I wanted to do. "Okay, my picture looks dark, I'll use Brightness/Contrast." "Oh, these colors aren't quite right, I'll select Image Adjust and then Color Balance, gee! That's simple." Well actually it's too simple. I suppose Gary, that it never occurred to you to use Curves and Levels did it? "No! What does baseball and carpentry have to do with anything?" Yes I am going somewhere with all of this. The obvious solution isn't always the best solution. I quickly realized that I wasn't getting the full benefit of all that a program like Photoshop had to offer. Proof? Did you know that when you use the brightness/contrast feature, you are brightening every pixel in that image? Ooh! What if I only want to adjust for shadow detail or a specific color in that image? My highlights are already pretty light and it will be a real pain to try and use 'Magic Wand' to select all the dark areas and feather it and… Welcome to Curves and Levels! This is definitely one of Photoshop's most useful and powerful tools. If you take a little time and learn what this tool can do, you will amaze yourself. Let's look at what these tools are trying to show you when you use them.
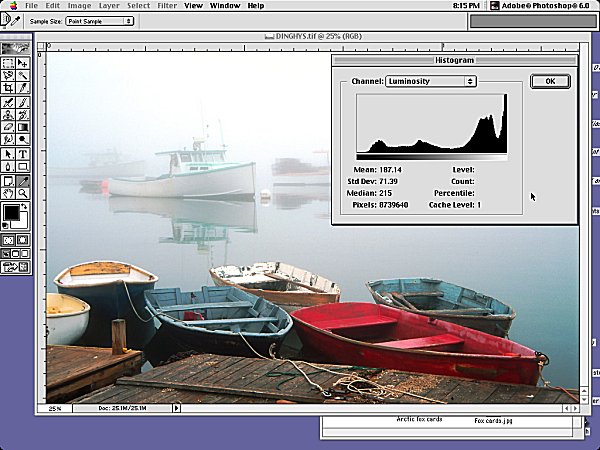
When you have scanned an image, you create a Histogram. In Photoshop, select Image from the menu bar and scroll down to Histogram). It is a graph that gives Photoshop a way of showing you, the viewer, what your image looks like and its characteristics. The histogram is showing you the brightness level of each color and the number of pixels at each level. A number between 0 and 255 (0 being black and 255 pure white for a total range of 256) is used to represent the value of each of these levels in your RGB (red, green, blue) image. Curves and Levels allow you to make color and tonal corrections in a controlled way unlike Brightness/Contrast or Color Balance.
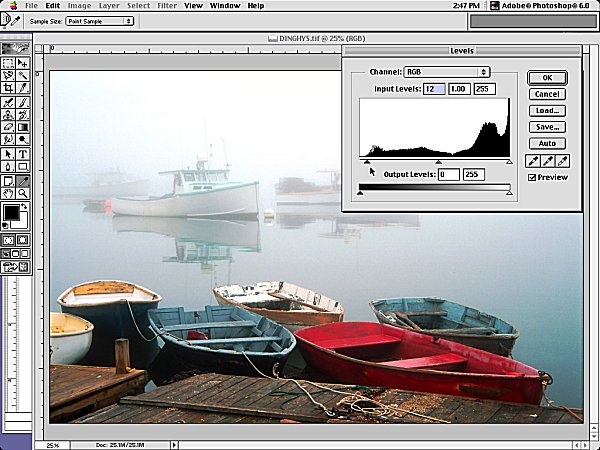
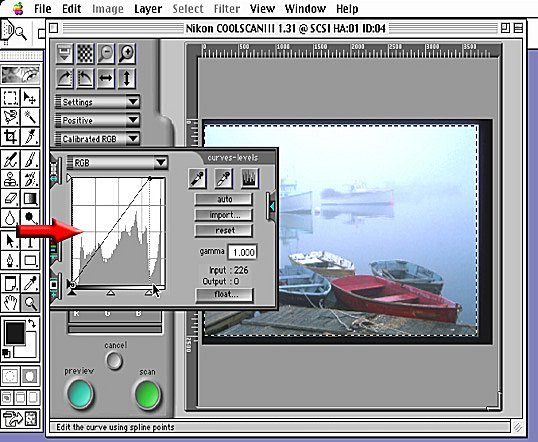
The Levels adjustment is easier to use at first because it looks much like the histogram. You can easily set your black and white points using levels (Illus. # 2). You can see from the illustration that there are more light areas in this image than dark. So the weight of the graph is toward the right or white side. If you grab the little triangle on the left (Black) and slide it to the right to a point where the graph reading begins, you shift to the area where you will want to work from. What you are doing in effect is compressing the tonal range. You can then adjust the Gamma or mid-tones without affecting shadows or highlights. What all of this means is that you are updating or re-mapping the information held within this image so that again, you can make more accurate adjustments to this image. The Curves adjustment looks quite different from the Levels adjustment but is the one I use most often. It takes a little more to figure out what it does, (that's what I'm here for), but when you do figure it out, you'll unleash the monster in you and your final results will improve, as will the speed in which you are able to make these adjustments.
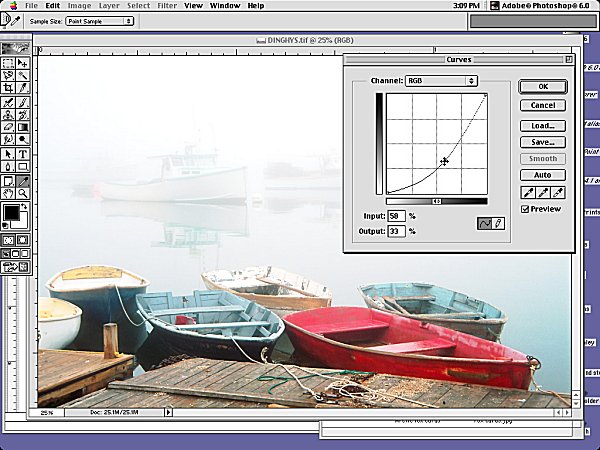
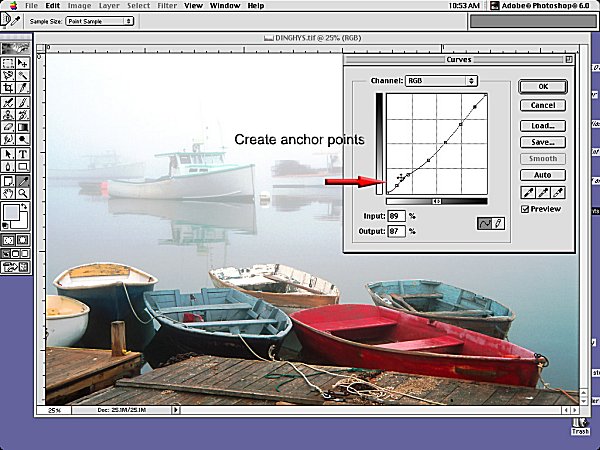
The diagonal line in the illustration uses the same 0-255 or same 256 levels in the image with white in the lower left and black in the upper right (you can reverse this order by clicking the arrows on the bottom flat bar). You can click and grab at any point and create an anchor along that line (up to 14, counting both ends). Moving up along that line and anchoring allows you to work on shadow detail, slide it down and anchor to work on highlights, and in the middle for mid-tones or anywhere along the way. Depending upon where you anchor, you can make subtle adjustments all along the tonal range as you see fit.
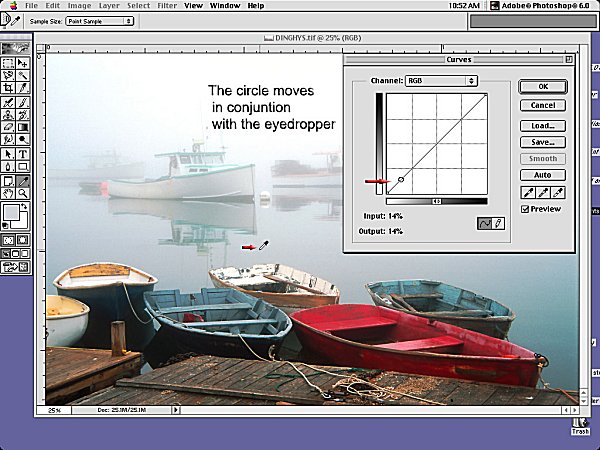
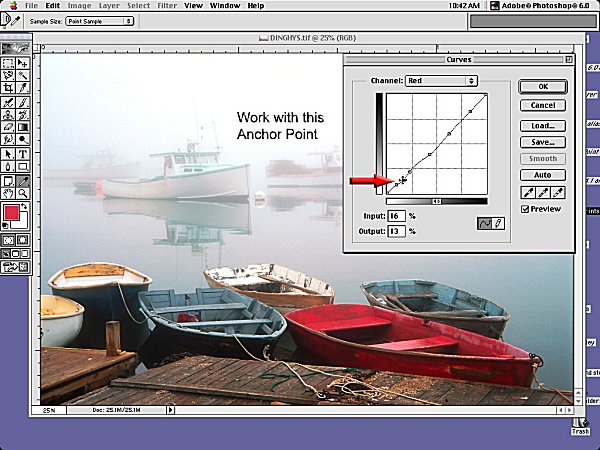
Okay Gary, how do I know where I am making these adjustments? Hey! Glad you asked. Open your curves palette and hold your cursor over the spot you wish to work (it becomes an eyedropper) (in this case the gray area of the water), then hold the mouse button down.
You will see a circle appear on the diagonal line indicating where that color falls in the tonal range, "is this cool or what?" Now, set your anchor points in this area and one where your circle was, and drag this point to make your adjustment.
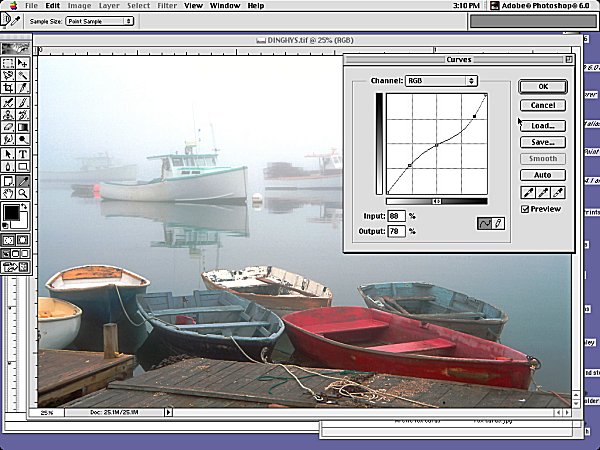
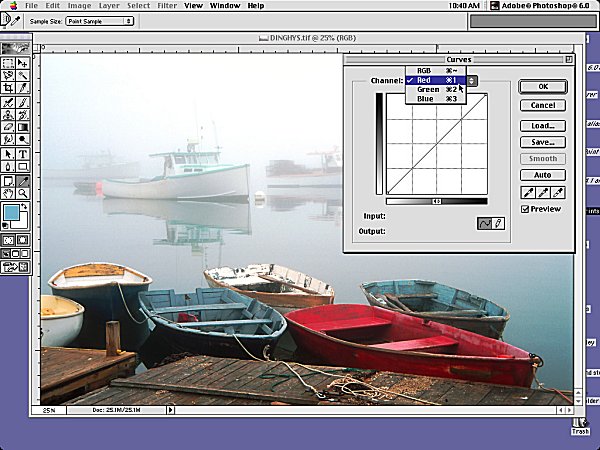
If this feels like trying to hold a piece of spaghetti with a fork, don't feel bad, I'm right with you here. Repeat after me: Practice, practice, practice. . . There is more good news as well. Precise color corrections can also be made to specific parts of the color channel using Curves or Levels and do it better than the Color Balance selection. Using the same approach as I mentioned above (leave out the spaghetti part), open the Curves palette, and up where it says 'channel: RGB' pick a color, say red,
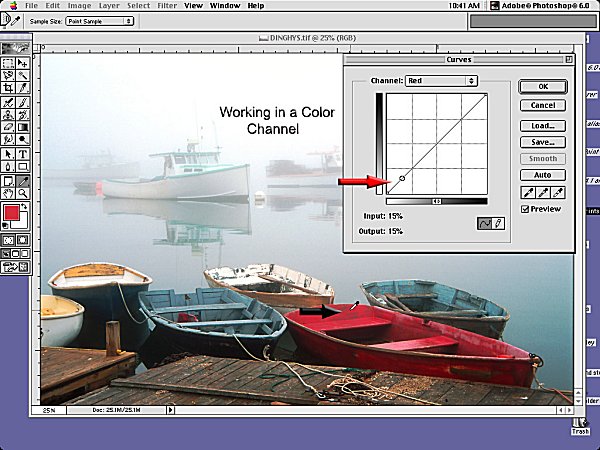
and again hold your cursor (it again becomes an eyedropper) over the spot you wish to work (in this case the red area at the back of the Dinghy) then hold the mouse button down.
Now you can work that color in that channel.
If you're familiar with the RGB color spectrum, you know that if you increase red you take out cyan; or if you work with blue, the opposite is yellow. A color wheel would help you here. I have a poor-man's color wheel: A post-it with the opposing colors written down and stuck to my monitor. I could go on with more detail, but I think you get the idea. Just remember that when you do any of these adjustments, do them in small increments. You can check and uncheck the preview box to see the difference in the adjustment that you have just made. Curves and Levels are sophisticated enough to do some amazing things with the image that you are working on. It's faster and more precise once you've mastered the basic techniques. Use Curves and Levels in the pre-scan first (in your scanning options), to retain more information in the histogram then once in Photoshop, you can make the balance of your adjustments.
|
|
|
|
|
|
|
|
|
|