|
|
|
|
|
|
| Black and White Filters by Chuck McKern Black and white photography is making a tremendous comeback. More people are experimenting with black and white films than at any other time in the past few years. But judging from some of the questions I've been receiving some people have been frustrated that their results don't look good as they expected. There are several filters that you can use to help control the contrast to create more dramatic images. The three most common filters for black and white photography are the yellow, orange, and red. There is something that we need to understand about how colored objects will appear on black and white film. To our naked eye colors appear distinct and different. But black and white film will record all colors in shades of gray. Sometimes different colors appear to be the same shade of gray on film so we have to adjust the contrast to distinguish between objects.
A yellow filter increases the contrast slightly and records a contrast level about what we would see naturally with our eyes. An orange filter creates a more dramatic increase in contrast. Red filters will create a very dramatic increase in contrast, especially in skies. We've all seen black and white images with dark dramatic skies that make the clouds pop out with an almost three dimensional look. That look is achieved in part by using a red filter. Keep in mind that when using these filters, you will need to increase your exposure to compensate for the filter. In most cases the yellow filter will need one stop more exposure, the orange about one and a half stops more, and the red about two stops more exposure. Modern in camera meters will adjust this for you automatically but if you're using a handheld meter you have to remember to add this adjustment to your reading or you'll be underexposed.
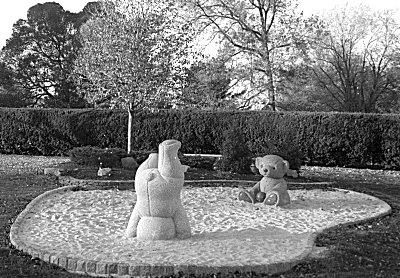
No filter
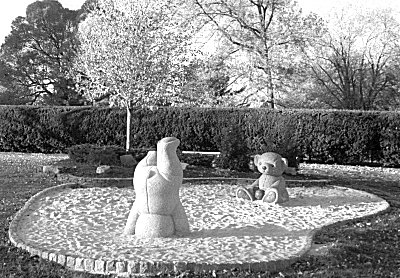
Yellow Filter
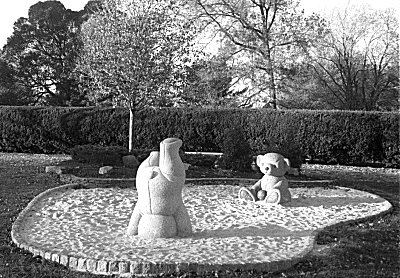
Red Filter
I mentioned that those dramatic skies are achieved in part using a red filter. But for the most dramatic effect in black and white photographs, you'll want to try using a polarizer with the red filter. This will cause blue skies to go almost black. Experiment with different polarizer settings to control how much you want to darken those skies. Just be careful when using the polarizer with other filters as you may get some vignetting in the corners with wide-angle lenses. Filters can be used to create dramatic photographs from ordinary scenes or to just give a little kick of contrast to help emphasize the way a scene really appears. Try experimenting with these filters the next time you are out shooting black and white, you may never shoot without one again. |
|
|
|
|
|
|
|
|
|
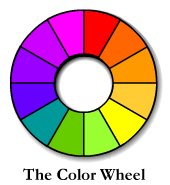 For
example, red and green will record in the same shade of gray when
photographed in daylight. If you use a red filter the green object will
become darker and the red object will become lighter - increasing the
tonal separation between the two objects. A green filter would do the
opposite, lighten the greens and darken the reds. This is referred to as
the law of transmission and absorption. This law states that a filter will
transmit its own color while absorbing its complimentary color. Meaning a
filter's own color will appear lighter while its compliment will be darker
(see the color wheel).
For
example, red and green will record in the same shade of gray when
photographed in daylight. If you use a red filter the green object will
become darker and the red object will become lighter - increasing the
tonal separation between the two objects. A green filter would do the
opposite, lighten the greens and darken the reds. This is referred to as
the law of transmission and absorption. This law states that a filter will
transmit its own color while absorbing its complimentary color. Meaning a
filter's own color will appear lighter while its compliment will be darker
(see the color wheel).