|
|
|
|
|
|
| Get Ready For Winter Photography by Gary W. Stanley
Mention to a friend that you want to go out and photograph on a cold winter day, and they will likely suggest a phone number for a shrink. This sort of reaction is on the same level with, 'Gary, you get up at 3:30 in the morning to do what?' "Sunrise!" 'No thanks I'll just wait a while, point my camera in the other direction and shoot sunsets if it's all the same with you.' Over the years I've found that the end resulting photographs will usually match the effort that I have taken to get it. Most of us, however, will stare at someone else's sunrise or winter photograph with a bit of jealousy wishing they had at least given it a try.
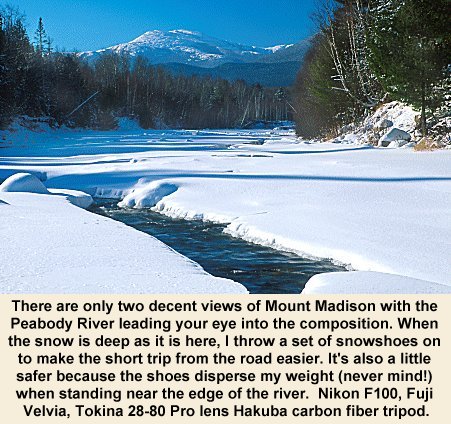
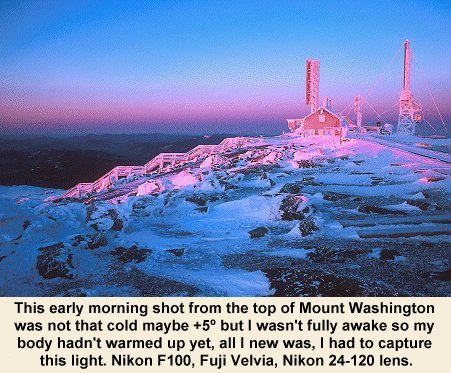
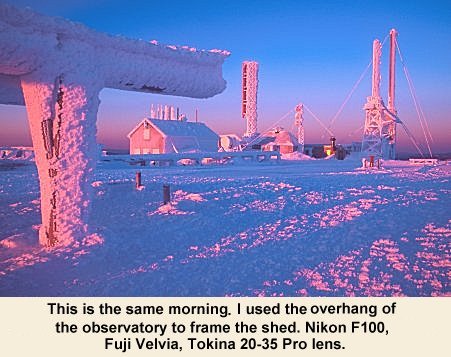
I'll be honest: I'm not willing to do what it takes to do some of the more extreme types of winter photography that some photographers are willing to do. I just happen to know there are more of you out there that feel the way I do than those who are willing to climb Mount Everest for a view from the top. This is where you put your thinking cap on and let your brain work for you. Why not find places that give the viewer the impression that you snow-shoed in five miles to get that shot. Just because you've hiked five miles, it doesn't mean that you're guaranteed a better photo. I sometimes use the close-to-the-road theory; "If in winter I have to hike more than a hundred yards, or endure temperatures below zero, I want to at least be close to the road, or more specifically, my car." Recently I spent four days on Mount Washington (highest wind velocity ever recorded on land happened here at 231 mph) in the White Mountains of New Hampshire. I was on an assignment shooting for NASA. I rode to the top of the mountain in a 'Snow Cat' (warm), stayed in the observatory where it was warm, and never ventured to far from the top. I photographed in bad weather for NASA, and in the great light I photographed for Gary. Take a look at the accompanying photographs.
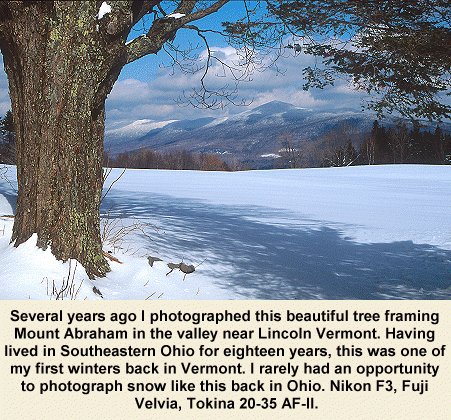
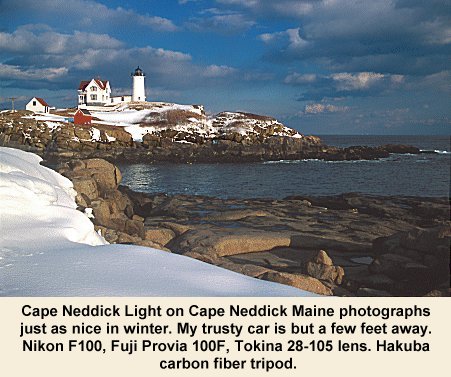
I've also included some winter photographs that I've taken in New England where temperatures were often -10° to -25°. My car was never far away (see tip #5), and yet I was presented with some great photo opportunities. The photographs were a pleasant reminder that with a little preparation you can successfully photograph in winter. Here are a few suggestions: 1. Most cameras made today are well equipped to handle the kind of winter shooting that I'm talking about here, and they don't need to be winterized the way the old cameras did. However, a fresh set of batteries in a warm pocket is definitely a good idea. If you've ever tried fumbling around looking for fresh batteries, and then try to install each one with cold fingers, you'll appreciate this bit of advice. I carry extra battery holders for my Nikon F100 so I can pull out the 'cold' batteries and replace them with the 'warm' cartridge quickly.
2. Invest in good quality thermal underwear that allows your body to breath and keep excess moisture away. This doesn't have to be the most expensive material on the market, just use what works for you and what works within your budget.
3. Layered clothing, warm gloves, head and face covering to help retain your body heat. I learned quickly on Mt. Washington the value of head and face covering. The winds often approached 100 mph, so just standing upright was a challenge. Good head and facemasks along with ski-goggles are an absolute must.
4. To my delight the most effective item I use to keep me warm has been the inexpensive air activated hand warmers used by hunters and ice fisherman. These warmers insert into your gloves or socks. They cost about a dollar, are environmentally safe and last well over seven hours in the cold. I was amazed at how well they work to take the edge off of cold weather. Please read the precautions on the back of the package, especially if you have sensitive skin. 5. Don't overlook one other very important tool for successful winter photography: your car! Or more precisely your car's heater. If you are not equipped for an arctic expedition, why not find locations that allow easy access from your car? Most of the photos in this article, with the exception of those taken on Mount Washington, were taken within ten minutes or less from the car.
6. Remember this important tip: "You can take a warm camera out in cold weather, but you can't take a cold camera suddenly into a warm environment." The great thing about using your car as your home base is that your camera has time to warm up gradually when using a car's heater because the car will have cooled down during the time you spent outside shooting, so condensation is not an issue. Condensation becomes an issue if you go from the outside cold into a warm house, for example. Then it would be a good idea to put your camera into a large gallon-size zip-lock plastic bag so when you do bring the camera in the house, the condensation will form on the bag and not the camera. If you have an unheated or partially heated (cooler than the house) enclosed porch or garage, you can start by letting your camera warm up there before bringing it inside.
7. Exposing for snow: Well, all that said, if you have plans of photographing snow there are some things you should know. If your subject is snow or contains a lot of snow, you may have to compensate for your meter's suggested setting. If you meter and expose for snow at the camera's suggested setting, chances are your snow will be underexposed and look very gray. If you want white snow to appear that way on film, you must add light to that subject. I use my camera's spot metering selection to meter the snow in bright sunlight and add about one and a half to one and two-thirds more exposure than the camera's suggested meter reading. This will help to maintain some detail in the snow. Two stops will be too much. On overcast days, I only open up about one stop to a stop and a third. Don't plan on seeing too much shadow detail because there won't be any. One more thing, if you use your evaluative (Matrix, Multi-Zoned) metering system to get your suggested meter reading, make sure your camera is not making the exposure adjustment for you (the computer may compensate for snow). Finally, if the most important subject is not the snow, try to take a spot meter reading off that subject so that it will not come out under-exposed.
These few suggestions will make winter photography more enjoyable, give you better results and allow you to concentrate on your composition instead of your frozen fingers and toes. |
|
|
|
|
|
|
|
|
|
|
 Spring,
summer, and fall are great times to take advantage of your photographic
skills. These seasons allow you to concentrate on taking great
photographs with little or no concern for the cold. While winter is
certainly beautiful in its own right, its the cold temperatures that
cause many of us to want to hibernate with the bears. Cold fingers and
toes along with the dexterity needed to operate your camera without
screaming become major distractions when trying to create an image.
Spring,
summer, and fall are great times to take advantage of your photographic
skills. These seasons allow you to concentrate on taking great
photographs with little or no concern for the cold. While winter is
certainly beautiful in its own right, its the cold temperatures that
cause many of us to want to hibernate with the bears. Cold fingers and
toes along with the dexterity needed to operate your camera without
screaming become major distractions when trying to create an image.