|
page 10 of 23 |
|
page 10 of 23 |
|
In-Camera vs. Handheld Light Meters We have all grown accustomed to the convenience of
having a light meter built in to the camera. They have always done a
pretty good job and as the years and technology have moved on, these
on-board meters have become much more accurate. With that in mind, is
there still a reason to have a handheld meter? To honestly answer this
question we have to take a close look at how the in-camera meters work.
The primary metering type for most cameras today is an overall meter. Meaning, it will take readings from different parts of the scene to cover most, if not all, of the viewfinder. These types of meters have different names depending the manufacturer (Matrix, Honeycomb, Evaluative). Although all the manufacturers have a different approach to how they take their readings, the fundamentals behind them are the same. To provide an accurate overall exposure for a scene, the camera's meter looks at the brightness level of multiple areas of the picture and determines the correct exposure based on what it sees. This technique is pretty good for average pictures. When you get into areas where the light is restricted from reaching large areas of the scene, it can cause false or inaccurate readings. Let's say for example, you're shooting a play on a
theater stage. The backgrounds are usually very dark and the subjects
are being lit with bright stage lights. Most meters will see the
dominate area of the scene as being dark (backgrounds are usually
dominant unless you can get in close using a zoom lens). The meter
will want to brighten that dark area up by calling for more exposure.
This, in turn, will cause your subjects to become over-exposed and
possibly blurred if the shutter speed dips too low. In the scenario described above, the camera will ignore
the background and will meter for just your subject (assuming you keep
your subject in the appropriate markings in the viewfinder). But if you
are off in centering your subject, the meter will expose for whatever it
sees. So watch out! Most cameras have a large circle in the viewfinder.
When using center weighted metering, the inner part of the circle will
make up a majority of your exposure and the remainder, outside the
circle, will make up a smaller part of the exposure. The amount of
weight given to the center portion will vary depending on the make and
model of your camera. The most common combinations range from 65%/35% to
75%/25%, the larger number being percentage of weight given to the inner
circle.
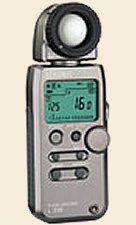
This brings us to the handheld meter. There are two basic types of
handheld meters. The first is a basic reflective meter. It works in
basically the same way as your in-camera meter and measures light being
reflected by your subject. Reflective meters are good with the old
manual cameras that work great but their internal meter quit and is not
repairable.
You could even use an incident meter in the theatre
example. If you can get in during a dress rehearsal (just ask, you may
be surprised by how easy it will be to get in), get a reading with the
meter. Be sure to ask if they are rehearsing with the same light levels
as they will use in the actual show (they probably are), and if they
are, get your reading and manually set your camera. You now will
be able to shoot the same situations without having to stay concentrated
on that small area in the viewfinder. But those of us, who are sticklers to get the most accurate exposure possible, or those of us shooting with studio lighting, will still carry handheld meters for when the need arises.
|
Is there still a reason to have a handheld meter?
The problem with
in-camera meters is that they are calibrated to 18%
Those of us who are sticklers or are shooting with studio lighting will still carry handheld meters |
|
text and photography copyright © 2001 Vivid Light Publishing |