Digital and the Wildlife Photographer
by B. Moose Peterson
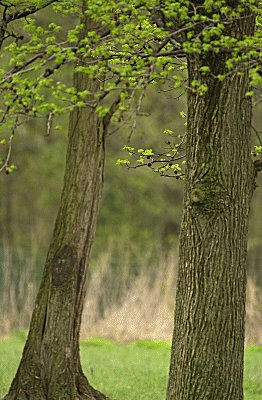 |
Nikon D1, Nikon
600mm f4 AF-S
on Lexar digital film, FINE,
cloudy -3 |
I haven't been this excited about capturing wildlife images with new gear in a long time! I used to be so envious of "newcomers," those shooters just venturing out for the first time because for them, every time they'd see a common species like a Great Blue Heron, it was something new and wonderful to photograph. When I'd see a Great Blue Heron, I'd say to myself, "do I really want to shoot the film, pay for the processing, edit, file and number the slides just to add more GBH photos to the files?" Well, no more because I'm beginning all over again and it's so much better the second time around!
When the D1 hit my desk in December 1999, I didn't even have an inkling that it would change my life! While I had been shooting digital in a "pastime" mode for a number of years prior to the D1, shooting mainly with the Coolpix 900 & 950, the effort I put into shooting these digital cameras showed in the images I captured. While shooting with the Coolpix 900 had started my workflow towards dealing with digital, my mind wasn't in a digital mode, as conventional still dominated my shooting. And I while I took digital seriously, I definitely didn't take digital seriously enough; I just tried to wedge it in. One thing I had learned though long ago is to start organizing, design a workflow from day one to avoid paying the piper later down the road.
"Workflow" is a great new word that has been created in the last few years that accurately describes what occurs when you depress the shutter release of a digital camera. Even more than with conventional shooting, when you have a good workflow for digital shooting it makes the whole process so much easier and much more successful. You just can't help yourself from going out and doing it more and more with the speed and ease of a solid workflow. And when it comes to wildlife photography, the more and more you do it, the better and better you become at it!
This two part series is all about developing a digital workflow for yourself so you can improve your photography. I didn't say improve your computer skills or capture more pixels, but improve your photography skills. In this process, you will learn some computer skills, I know because I have and still have a long ways to go! But any "tool or technique" that gets you into the field more often and for longer, is going to help you improve your photography!
I'm not about to suggest you must switch to digital nor that conventional photography is all washed up, far from it. What I'm relating is information I think can improve your digital photography or if you're thinking of getting into digital photography is a great place to get a jumpstart. You
must have a firm foundation to make digital work for you. The workflow I'm suggesting here provides you with just that, a firm foundation from which to build and grow upon. There are going to be times, I guarantee it, that things will go kafoey, but with a strong foundation and good workflow, you can avoid the "blue screens of death" in digital photography!
The Digital Wildlife Photographer - Getting Started
When folks ask me where to start in digital photography, I always tell them with a "pocket" digital camera. They're usually looking for an answer like the D1 (maybe so they can tell their wives it's my fault they bought one) and seem disappointed when I say pocket digital. There are two "pocket" digitals I can highly recommend to you, the
Coolpix 990 and the Kodak DC 4800. These two "pocket" digital cameras can teach you so much about digital photography and about photography, you'll wonder how you ever got along without them! (Just for a point of reference, I still use them and they have replaced the family APS camera!)
I realize I'm asking a lot of photographers to start with "pocket" cameras, but there is a reason for this. One of the first is getting a handle on the expense of digital. While the overall costs are far below conventional photography (which I'll cover later) the initial cost can make you gag! I have always said the best way to spend your money is on time and film to be out in the field shooting! I'm going to assume for the moment that you have a digital camera in hand so we can proceed.
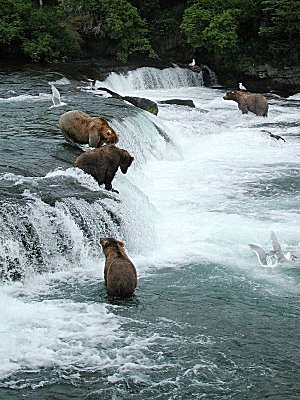
 |
Nikon Coolpix 990, Lexar digital
film, FINE, sunny |
The next thing you must learn and master in the digital workflow is white/color balance. While this very important facet of conventional photography rules what we do, the vast majority of photographers haven't a clue of its existence or affect on our images. If you transfer this ignorance of white/color balance to digital, you're dead in the water before the first stroke! It will ruin your images!
Here's a little history lesson before I proceed. White/color balance is a rating based on the Kelvin scale that measures the actual color temperature of light. Conventional film as well as digital film has a "base" rating of 5500k. That is to say that on the right day in the right place at the right time around noon, if you metered the color of the light with a color meter, it would say 5500k. (This never holds true for any metropolitan area, as smog really alters color temp!) Overcast days and/or higher altitudes can increase color temperatures to as high as 12,000k! When shooting with conventional film, the overall color in this situation has an overall blue cast to it because the 5500k rated film is seeing 12000k light.
This blue "tint" goes unnoticed by the vast majority of conventional photographers. Shooting digital though, this blue "tint" smacks you right in the face with the most horrible of outcomes! The photograph sucks! So with digital, you must learn and master white/color balance to have an effective workflow.
I've found the Kodak DC 4800 is an amazing camera when it comes to white/color balance! I am simply amazed just how incredibly dead on its white/color balance is time and time again no matter the lighting I throw at it. Having a "pocket" camera do this from the very first time you start shooting digital is a big leg up as it forces you to see the good and recognize the bad. The DC 4800 goes so far as permitting you to manually change the white/color balance (though I always shoot on "saturated") by increments of 500k while displaying this change on the camera's LCD. This is a killer learning tool for learning and mastering white/color balance! We'll come back to this white/color balance thing in a moment, but let's move on in the workflow.
The next dilemma folks have with digital is setting the resolution. I should preface what I'm about to spell out by saying I'm not a pixel counter. That's to say, I don't feel nor have found in shooting digital for three years (strictly nothing but digital for the last year) that I have to capture the biggest possible file the camera is capable of capturing to be successful. A giant part of my workflow is capturing the images correctly in the camera, which is the only time you learn more or make money. I don't believe in "fixing" things in the computer that should have been taken care of when the shutter was clicked. This includes pixel count! (Yes, I understand that in theory you can get more out of a "giant" file to begin with but when I can produce the quality required by my own standards and my clients' with "minimum" files which speeds up the whole process so I can take more images, that's the avenue I have always and will always follow.)
Let's get back to this resolution thing. Most "pocket" cameras are capable of capturing a maximum file of about 3MB at their maximum setting. This maximum file size does have the maximum amount of digital information, but it also takes the maximum amount of file space, maximum amount of time to write the file from the memory buffer to the CompactFlash card and the maximum amount of storage space in the computer. I prefer not to use the maximum for all of these reasons and more in my digital workflow.
The mode I shoot in all of the time no matter the subject or final use is the highest Jpeg setting available. On the Kodak DC 4800 that's the 3.1MP setting and with the Coolpix 990, that setting is "fine." I can already hear some naysayers commenting, "Moose hasn't a clue what he's talking about and he's giving out bad info." Depending on your point of view that might be true. But let me provide you with some facts that have led me to this conclusion. (There are many articles in print that fly in the face of what I'm saying here. All I can say is that I've had over 400 original digital images printed in the last 12 months. There must be some truth in what I'm saying.)
The first big concept behind large files is that it provides the pixels required to make large prints. When I first started I too was under the spell of "it must be large!" That is until after talking with folks shooting at newspapers who told me they were shooting on "fine" mode and making six column images. What put the final nail in the pixel count theory to me was when a software company took one of my "fine" mode Coolpix 990 images and enlarged it to 7x4 FEET and put it on display at a major photographic trade show. When folks walked up to the print, the guesses at how it was made were so far off the mark it was laughable. When they were shown the original file and told what camera it was taken by and the file size, they were blown away! The moral is the biggest file wasn't required for the big print to produce giant results! (Superior digital image quality comes from a great workflow, which is the point of this series.)
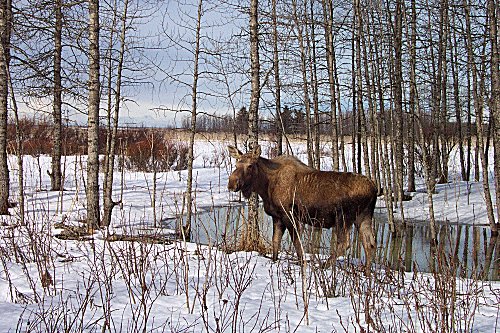
 |
Nikon Coolpix
990, Lexar digital film,
FINE, overcast |
The second big concept behind large files is it gives you more to work with or "manipulate" later in the computer. This is very accurate, the math verifies that when you have a larger file you do have more to work with, correct, change and manipulate in creating the perfect image. But here again, my whole workflow and simple philosophy towards photography is different. It was always impressed upon me by my influential friends and later by personal experience (always the best teacher) that getting the image correct when you depress the shutter release creates the superior image from the get go. This holds true to conventional and even more so with digital. When you send a client your 35mm slide, what they see there in the mount is what you captured when you took the photo. I hold this same high standard to my digital photography. When I send a file to a client, what they see is what I captured!
This very high standard of capturing the image right (matching my requirements for the perfect image) in the beginning is also what makes my entire workflow work so incredible well for digital. This medium with its instant gratification, instant results and instant feedback of what is right or wrong should not be IMHO slowed down by waiting for computer time to make perfection. And since I can't use PhotoShop to even remove a wart, relying on that crutch to save my images just isn't in the picture for me! (Just so the record is straight, I have absolutely no problem with images being manipulated in PS. I admire those who do it well, but it simply isn't my stick.)
Don't let my drive for image perfection scare you off! I offer all the info that I do so you too, if so desired, can acquire the ability to create perfection from the instant you squeeze off the shutter release!
In the beginning of your digital revolution (or evolution) you'll have to have a computer if for no other reason than to store your images. Here again, you don't have to have the latest and greatest to make things work nor to develop a workflow. When I started with the Coolpix 900, my PC computer was a simple 300Mhz, 2GB machine. This did just fine in the beginning and helped me develop the workflow I use today because of its slow speed (compared to toady's computers) and small storage space, setting my original workflow parameters. Now since you're reading this article on the web, it would seem to me you already have a computer and more than likely, enough to get started in digital. (I'm not a computer wizard, but I have a partner who keeps me straight on those things. I will relate later on what I have and why to provide you with some food for thought.)
There is one peripheral I do feel you should have from the beginning for your computer. It goes hand in hand with your film. You must get your images at some point from your camera/CompactFlash card to your computer. I have found that using Lexar Media's CompactFlash USB cards with their USB Reader to be one of the easiest, fastest and safest ways to get the images to my hard drive. No matter if it was shot with a "pocket" digital camera or the D1, this has worked the best for me. (If I'm using the notebook as I do when I'm on the road, I use a Card Reader for ease of operation.)
 |
|
Kodak DC
4800, Lexar digital film, Saturated, auto |
It is with these basics of the pocket digital camera and computer that the workflow begins. You want to establish a workflow where the image you capture when the shutter release is depressed is what you want for your final image. This must include white/color balance, resolution along with the basics of exposure, composition and all the rest.
The Digital Wildlife Photographer - Getting Serious
Moving on with the workflow and taking the medium serious requires understanding the "film"! You probably thought I was going to say something like requires buying a D1. But before you buy the D1, D1X or D1H, which you're going to do sooner or later, you still must master digital film! There are a couple of aspects in particular I'm referring to but mostly it's exposure. Digital film sees the world in a totally different way. How is digital exposure so much different than conventional exposure? You're using an electronic medium vs. silver medium, which completely changes things!
The one real biggie here is that digital film can hold five stops of exposure information where conventional film can hold only three stops. This "advantage" is only one if you understand light to start with (which is a requirement no matter what you're recording your images on). We're use to seeing great images that have a range of three stops or less. (If you don't understand exposure latitude or range, you have some homework to do!) Even though digital can hold five stops, when you see such an image it simply looks "wrong" because we are so use to seeing three stops of info, not five. But if you're smart, you can make this work for you in situations where you can't with conventional film.
One of my favorite lighting situations is overcast light. This is a "flat" light source by its very nature that digital is great at exploiting! With the increased range of five stops, you can "build" contrast into a flat or low light source with digital's ability to capture those five stops because it can see further into the shadows. I've been hammering this aspect of digital and it works so well it greatly extends my shooting opportunities and success. This fits so beautifully into my digital workflow, it's hard to contain my excitement!
This brings up another cool thing about digital film, the "variable" ISO. An aspect of digital film I often forget is available to me because of the decades of shooting conventional film is the ability to change the ISO frame to frame. With some cameras, changing a digital ISO to 800 or 1600 can bring other issues into play; this option can really help you in a pinch. Just for a point of reference, I always shoot at either 100 or 200 ISO with digital.
 |
Kodak DC 4800, Lexar digital
film, Saturated, flash fill, auto |
Another great thing about digital is the ability to change white/color balance on the fly, frame to frame. In the "old" days if I were to shoot exteriors of a building and then go inside, I would have to change film at the very least to begin to correctly color balance the images. With digital, with the rotation of a dial, you can change the white/color balance from daylight to tungsten to fluorescent from frame to frame. With cameras like the D1, you can use the Pre-Set on the white/color balance to pin point the exact balance for even mixed lighting, something you can never do with conventional film!
This is what I consider the basics needed for a firm foundation in digital photography and the basis of my workflow. See, that wasn't that tough, not too technical and in all honesty, a no-brainer for anyone to master! I hope that with this, you're craving more, which is my goal. Like I said in the beginning, I find digital to be incredibly exciting and opening up doors of opportunity that even someone like me who has been shooting wildlife for nearly twenty years didn't think were possible. In the second and last part of the series, I'll talk about shooting with the D1, the digital film I use and the software I use to finish my workflow. It's the digital workflow that permits me to be in the field more of the time with higher success and the greatest amount of fun I've ever experienced in photography!
Cya next month!
 Subscribe to
Vivid Light
Subscribe to
Vivid Light
Photography by email
|
|
It's so much better the second time around!
Developing a digital workflow
so you can improve your photography
I don't believe in "fixing" things in the computer
Get the image correct when you depress the shutter release
|