|
|
|
|
|
|
Essential Filters for Nature
Photography Whether
it's a workshop, seminar, or a prospective buyer of a gallery print, the
same question seems to always surface: Whether
it's a workshop, seminar, or a prospective buyer of a gallery print, the
same question seems to always surface:
"Mitch, did you use filters to capture those colors?" The use of filters in photography has always been a sensitive subject in regards to creating images that don't "look real". Comments such as "It's not what you're really seeing" or, "you're doctoring the image" have surfaced and resurfaced over the years. The number of filters on the market today is mind boggling. You have general filters, creative filters, colored filters and even special effects filters. In one brochure alone I counted sixty-nine different filters! Add up these numbers, and the cost can be staggering. Some photographers make heavy use of filters, while others use them quite sparingly. It's a matter of style and preference. Well, all you nature photographers can just relax and take your hands off your wallets. In this article I'll introduce you to a handful of essential filters for nature photographers. They work equally well if you're shooting film or digital. Polarizing Filter There are two distinct types of polarizing filters. Circular polarizers are by far the most common today and will work on both manual and autofocus cameras. Less expensive linear polarizers are uncommon in today's camera shops since they only work for manual focus cameras. Polarizing filters have the ability to:
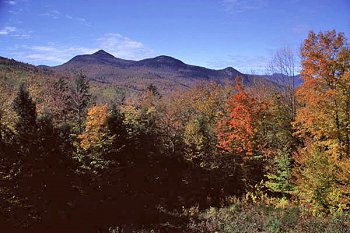
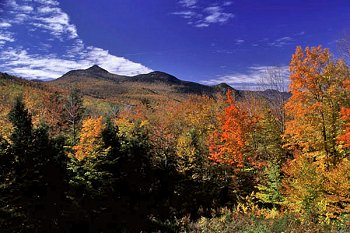
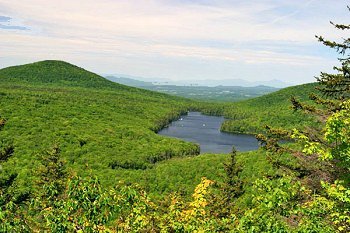
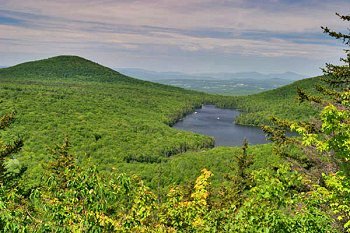
To deepen blue skies the polarizing filter is best used at 90 degrees to the sun, (the Sun's position should be directly to your left or right). By rotating the outer ring you can observe the different degrees of polarization through the viewfinder. Use it on days when white fluffy clouds dot a blue sky, and watch the separation occur. Combine fall foliage, and a clear October day and watch the colors explode!
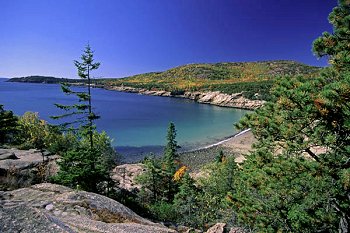
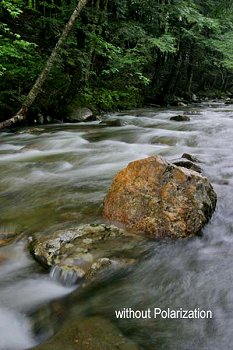
A word of caution, be sure not to over polarize your skies - overpolarized skies can look dark, almost black. Watch also for partial polarization, where only part of the sky is affected. This usually occurs in very early or extreme late-day light. Polarizers are a great tool for shooting water. Notice how the glare on the wet rocks is reduced, contrast in the water builds, and it becomes possible to see "through" the water into the streambed (Photos 5&6). This filter is a must for any nature photographer.
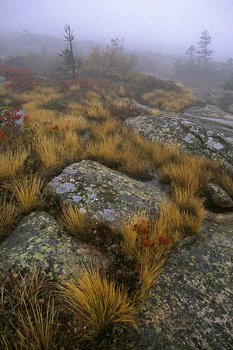
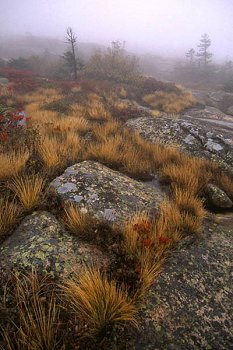
Warming Filters Shadows in snow produce an exaggerated blueish color cast on film that is invisible to the naked eye and foggy conditions render a blue cast on film as well In both cases warming filters will reduce, or in the case of fog, eliminate this cast. Overcast days tend to be on the cool side in terms of color rendition as are open shade. A warming filter can be useful to extend the soft glow of early morning and late afternoon light.
Warming filters are graded by their strength. 81A, 81B, and an 81C are the most common, with 81C being the warmest. My personal choice of warming filter would be no stronger than an 81A. Warming filters are often combined with polarizers. In the right conditions these "warm polarizers" provide more saturated colors and images that look as if they were shot in early or late "magic hour" light throughout the day. Digital cameras have a function called white balance. By adjusting white balance you can achieve the same effect as you would with a warming filter. How much control you have over white balance will vary from camera to camera and on many cameras the preprogrammed settings will produce images that are too warm and a filter will still be your best option. In Photoshop CS you now have the ability to add this filter effect in the computer. Under: Images/Adjustments, scroll down to Photo Filter. Here you'll find the warming effect with increments done in percentages. I've found you can get some outstanding results experimenting with this new Photoshop filter. In PaintShop Pro you can control the color temperature of your image using Effects, Automatic Color Balance. By adjusting the color temperature you can make an image warmer or cooler giving the impression that the image was shot at a different time of day or under different light. Split Graduated ND Filter
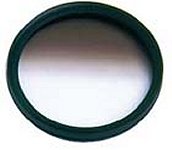
Often times we run into situations where the range of light in the scene is more than we can capture - either on film or digitally. An example would be a snowcapped mountain in the Rockies, with a lush green meadow in the foreground. Meter the snow at a given shutter speed and our aperture is f/22. Meter the green field at the same shutter speed and we get a reading f/5.6. There's a four stop difference between the two. It's nearly impossible for film or a digital sensor to record detail in both highlights and shadows over that range. No need to worry, we have a Graduated Neutral Density Filter. This filter is designed so one half diffuses the light, and the other half is clear. The filter gradually fades the filtered area into the clear area. These filters reduce the contrast range by filtering the brightest areas, bringing the correct exposure for highlights and shadows closer together, and into a range your camera can capture and can be purchased in one, two or three stop increments. This refers to how many stops of light the opaque portion of the filter will block. They can be purchased as rectangular or screw in filters. Rectangular filters can be held in front of your lens or slipped into a filter holder. I find a rectangular filter and a holder the most useful as you have more flexibility to adjust it to the scene.
Saving Some Money You'll be amazed at the usefulness of these lightweight devices. Experience and experimentation will teach you which filters work best in different situations. Finally don't be afraid to combine filters to create some truly unique images. Photography is all about light, filters are tools you can use to control the light. |
|
|
|
|
|
|
|
|
|
|
|
All
materials contained herein © Copyright Vivid Light Photography Magazine
2001, 2002, 2003, 2004 |
|