|
|
|
|
|
|
| 8 Steps to Successful Nature
Photography by Mitch Moraski
It is much the same for nature photographers. Unlike stock agencies, my portfolio does not consist of 200,000 images. But my portfolio does consist of images that were taken with great care, with a careful thought process and a goal in mind. I like to slow the process down, to shoot for quality over quantity. Photography should be relaxing; this is not a race! I look for what I call "screamer images". So in this article I'd like to share with you eight tips that will help you become more successful at capturing images of nature.
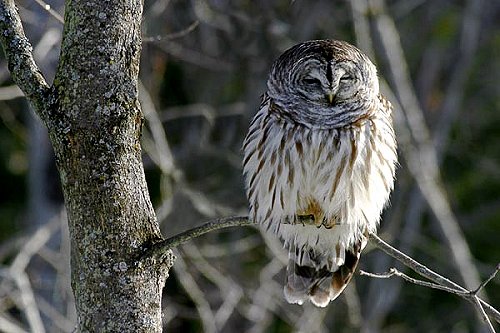
Ansel Adams is a perfect example of a photographer using this simple technique. His portfolio was small in comparison to today's professional photographers. His approach was to do exactly as I said. He would spend countless hours and days studying an area, watching the light, finding the exact place to position his tripod. Was he a success? Well, you already know the answer to that. Patience is especially important when it comes to macro photography. Try photographing a dew covered butterfly, or a spider's web with a slight intermittent breeze, and shutter speed of ½ second. Can you do it? Can you make it sharp? Apply yourself and you'll succeed! But you'll only succeed with patience. 2) Look for good light: In my workshops I can't stress enough the fact that you are capturing light on film. Understand that early morning light can provide us with fog, which creates a mood, and a cold autumn morning provides us with mist rising from a pond. Morning light is cool and can often be recorded with a blue tint not visible to the naked eye. To correct this use an 81A or 81B warming filter. If you shoot digitally, you can correct with your white balance. Overcast can be good light. Use those overcast days to photograph macro images and intimate woodland landscapes. But on overcast days stay away from landscapes with high white skies. Include sky in your images when the sky has a positive effect upon the entire image. A dramatic sunrise or sunset, or midday when the clouds are like giant marshmallows against a deep blue sky. Use early morning and late day light to emphasize texture in landscapes. 3) Use a tripod to create sharp images: a tripod will allow you to shoot under any lighting conditions and allow full use of all shutter speeds and apertures. It will allow you to fine tune your image by adjusting your tripod head vertically or horizontally, and also by adjusting the focal length of your zoom. Bracketing or shooting multiple images in camera is often required, especially when shooting with film. By shooting from a tripod all your images will be identical in composition. 4) Simplify your image: Keep your images simple and to the point: When photographing landscapes stay away from limbs or other objects that may intrude from the side of the frame and hang in mid air as if by some form of magic. I like to refer to these as "intrusion monsters". Watch background and foreground elements as well. It's easy to concentrate on the main subject, but forget about the balance of the image. In the picture of the barred owl, it took me three weeks to find him perched on a limb without any distracting foreground or background limbs. My first several shots were OK, but not what I wanted. This one's a keeper!
5) Good use of depth of field: when landscapes require the use of a wide-angle lens, a strong foreground element is important. (Stream image) Your goal is to establish a good foreground to background plan of focus. Use a small aperture to get the greatest depth of field. In some instances a shallow depth of field may be preferred, as in the image of the barred owl. I didn't want the background limbs to be a distraction from my main subject, so an aperture of f/8, with a focal length of 640mm, still very shallow at this focal length, (digitally, Canon 10D) was used. As in bracketing for exposure, often times bracketing for depth of field may be helpful until you see your final image on a light table. The biggest complaint I receive from students is that by using your depth of field preview button at f/22, it's tough to tell exactly what the finished image will look like because the viewfinder goes so dark. This is why I suggest bracketing in f-stops. 6) Proper exposure: What good is an image if it's not properly exposed? If you're someone that enjoys shooting with slide film, I can't emphasize enough that you should learn about the Zone System and adjusting for proper tonality. With slide film, a ½ stop can make a BIG difference. Snow for instance requires overexposure of 1-1/12 stops to make it white. Or a black bear will need to be underexposed by 1-½ stops to make it black while a brown bear is medium toned. Those of you that shoot digitally will find the same theories apply. Digital photography is much like shooting with slide film. Learn to read and understand your histogram. Many of today's 35mm cameras offer very sophisticated metering systems that allow you to spot meter a particular area, (1%-2.5% is most common) and adjust from there. I highly recommend bracketing. Is bracketing an insult for the experienced photographer? Absolutely not! If I'm in national park and don't plan on going back soon, I'd rather be certain and come home with a properly exposed image. 35 cents for a piece of film is a lot cheaper than a plane ticket!
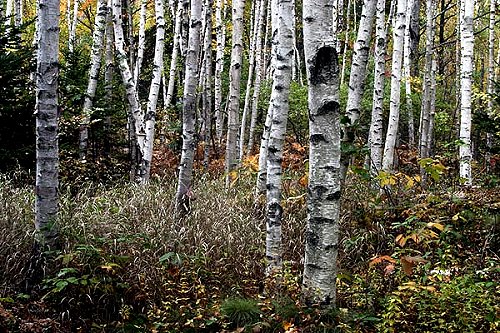
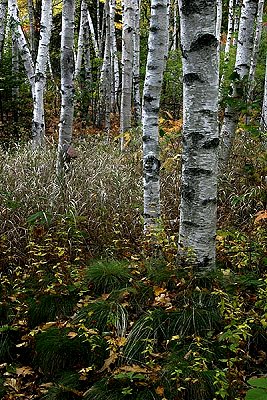
7) Know your Equipment: This is the most common area of frustration when it comes to working in the field for most amateur photographers. Why? Because often times our cameras sit for weeks and months at a time until it's time for the next "big trip". Understanding the functions of your system is pertinent to success when the "big moment" comes on the "big trip". You should know your camera the way you you're your car. Do you have to think about where the headlights or turn signal are? Probably not, and when you're photographing a subject, just as when you're driving your attention needs to be out in front of you - not fiddling with the controls. Not knowing where the controls are can mean not getting the image. You must know where your depth of field preview button is without even looking. Do use I Av, Tv, or manual? What are your custom functions? Do I need mirror lockup at a given shutter speed? How to change lenses quickly, how and where to put your cable release, and how to use your tripod. Think about it…would a carpenter go to a job site and not know how to use his tools? Please, please get to know your equipment. Read your manual, and keep it with you at all times. 8) Work your subject: Working your subject applies to understanding perspective. Perspective can be controlled in two ways. First, by physically moving left, right or up and down. Second by zooming to increase or decrease focal length. I find woodland images to most challenging when it comes to perspective. You need to move and observe. I find many photographers who just by instinct, set their tripods at eye level and never lower. One tripod location may offer several different focal length opportunities and changing the height can dramatically change the image. And don't forget to shoot vertically as well as horizontally. You never know when you'll get that cover shot!
Photography should be about enjoying the outdoors. Use it as recreation and relaxation, and as a way to record what we love most. We all want to hang that "winner" in our living rooms for all to enjoy and share. My theory has always been quality over quantity! Five awesome images will always outweigh twenty mediocre images. Enjoy! |
|
|
|
|
|
|
|
|
|
|
 Anyone
performing a task, whether it be a carpenter, a cook, or a designer, has
guidelines to follow; these guidelines allow them to complete projects and
make success likely.
Anyone
performing a task, whether it be a carpenter, a cook, or a designer, has
guidelines to follow; these guidelines allow them to complete projects and
make success likely. 1) You MUST be Patient: Patience must be your most valuable
learning tool. Find a location of interest and frequent it often, from
early morning until late evening, and watch how the light will change from
hour to hour and day to day.
1) You MUST be Patient: Patience must be your most valuable
learning tool. Find a location of interest and frequent it often, from
early morning until late evening, and watch how the light will change from
hour to hour and day to day.