Site search Web search

Vivid Light Photography, digital and film photography online
Home Systems: Great Deals from
Dell
Adding Interest with Borders 
by Jim McGee
Over the past few months we've featured a number of articles on how to improve the quality of your digital prints. That's OK if you're just after a straight print. But what if you want to make your prints really stand out?

For years photographers have introduced custom borders into their prints in the darkroom. A simple visual device, they can make a dramatic difference to the final image.

Examples 
We'll use our hand colored black and white image from last month's issue to illustrate some techniques ranging from simple to complex.

A Simple Border
This is as simple as it gets. Just add a simple black border from one to a couple of pixels wide. The width will depend on the size of your print, but the border should be very thin compared to the overall size of the print. Surprisingly this thin border can have a dramatic affect on how the viewer perceives the image.

It works best when the image contains light tones along its edges. There will be virtually no effect if the image has strong color or dark tones along its edges already. By creating a border you define the edges of the image and trick the eye into focusing into the image - ignoring the background. Print the same image with and without this thin border and show it to ten people. Almost every one will tell you the one with the border is the sharper of the two images!

This is why artwork framed by professionals will often feature multi-layer mats, with the inner mat creating a black border around the artwork.


A Wide Border 
A wide border has the same effect of creating a boundary that focuses the viewer's attention into the image but the effect is more obvious to the viewer.

Experiment with wide borders. They don't work for every image, and if they're too wide they can actually distract from the image.


Adding a "Film" Border 
When the full frame of a slide or negative is scanned on a flatbed scanner you'll pick up the holes for the film sprockets (35mm) or the border of the film (medium format). The result is much more pleasing for positive images than negatives, and has been used for effect in both advertising and fine art prints. You can create your own border effect on any image through some simple steps.

Select an area just inside the frame that is roughly the same width along the entire border. Invert the selection so that just the outer edge is selected. The clarity of a slide tends to fall off at its edges. To simulate this, crank up the gamma to decrease the density of the selection, then open the Gaussian Blur filter and apply a slight blurring to the border area. The exact amount will vary depending on the image size. Start with a radius of 1.0 pixels and adjust upward or downward while carefully watching the effect. Remember you don't want it to be obvious.

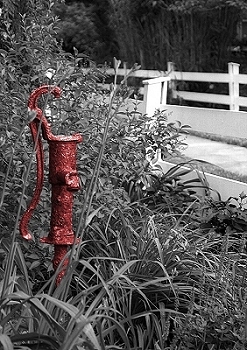
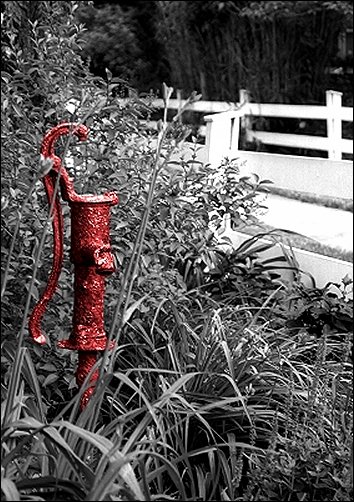
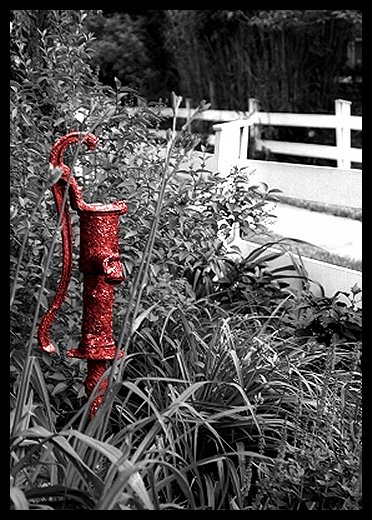
Now add a wide border in black around the whole image. Once again the exact size will vary depending on the size of your image. You can use the image here as a guide. Once the border is on you'll notice that the sharp corners of your original image don't quite match what you see on the light table. Use your paintbrush tool to round off those sharp corners. Don't worry about making them perfect.

To add in the text I used the font OCR A Extended (this is a Microsoft font that may not be available in all Windows versions). It isn't a perfect match for the font on Fuji film but it's close enough that it only needed a small amount of tweaking. The color 200, 200, 0 (R,G,B) got me in the neighborhood for the film labeling and a quick check of your existing slides or the Fuji Data Guide will provide the correct text.


Simulating the Look of an Enlarger Mask Edge 
Darkroom prints can have a variety of edge effects caused by the negative carrier. These edge effects are sometimes left exposed to show that the print has not been cropped or simply for esthetic effect. You can give your digital prints a similar effect by fiddling around with the borders.

Start by creating two new layers and then move your background layer to the top. One of the new layers now becomes the background layer. Increase the size of the canvas to 110%. Fill your new background layer with white and the empty intermediate layer with a dark gray (not black).

Click on your top layer (the one containing your image) in the layers dialog box while holding down the control key. This will select all of the top layer. Then do a Select-modify-border command. Depending on the size of your image enter a number of pixels that will create a thin border around the edge of the image.

Using the airbrush (set lightly, around 25% or 30% opacity) and the blur tool (also set around 25%) on the top two layers make the edge irregular. You'll be leaving the bottom white layer alone. There is no set formula for this and there is not right or wrong. Work on a copy and play at it for a while. If you don't like the results delete your working copy and make a fresh copy from the original.

It's really amazing just how much you can change the look and feel of an image just by experimenting with borders and edges. Best of all you can do all the experimenting you want for free! You don't have to make test prints until you get the results you want.


Buying Your Borders

Extensis makes a Photoshop plug-in call PhotoFrame to automate the process of creating borders and frames described in this article.

Extensis comes with a library of over 2,000 creative edge effects designed to add impact to your images. You can combine any of these pre-packaged frames or use the package to create your own frame effects.

Extensis PhotoFrame retails for $199 and is available for both the PC and Mac. 

Mac OSX is supported.                       


  Subscribe to Vivid Light 
Photography by email 

Tell Us What You Think

Vivid Light Photography, monthly photography magazine online

Site search Web search

Vivid Light Photography, digital and film photography online