
|
|
|
|
|
|
| Ten Tips for Better
Photos by Vivid Light Staff There are some basics that, once mastered, can make a big difference in your photography. It's the difference between taking snap shots and creating images. If you're new to photography you'll be surprised at how much difference these simple things can make. If you're an old hand we may just jog your memory. 1. Get Close - Then Get Closer The same holds true for landscapes. Too often we're awed by a huge vista but we fail to capture that vista on film. So take that wide shot, then spend a few shots concentrating on things within the scene. Often these will be the better shots. What if my zoom isn't long enough to get just the part of the scene you want? You have two choices. You can start walking and get closer that way, or if the subject still fills most of the frame you can crop the image when you (or your lab) print it. 2. Understand f-stops and Master Depth of Field In portraits we want very little depth of field. We just want the person we're photographing to be sharp and for everything else to go soft. That way there is nothing to distract the eye from the subject of the photograph. In landscapes we want everything in the picture to be sharp, from the little details in the foreground to those soaring mountain peaks off in the distance. Now while that concept is pretty easy to remember the subject of small and large f-stops is what confuses people. An f-stop of say f8 is actually short hand for an f-stop of 1/8th. So the larger the number the smaller the lens opening; f22 is much smaller than f4 because 1/22nd is much smaller than 1/4th. The way that relates to your images is the smaller the opening the greater the depth of field. f22 will give you sharpness throughout your image while f4 will render only your subject sharp. If you're confused just remember this simple rule: Large f numbers = greater depth of field and small f numbers = less depth of field. 3. Get a Tripod and Use It! Even the smallest movements of the camera while the shutter is open can translate to soft images. This is especially important when using long shutter speeds, shooting in low light, shooting with long telephoto lenses or when doing macro photography. When shooting from a tripod use a shutter release cable or your camera's self timer to further reduce vibration. 4. Use Your Flash Outdoors But you're not limited to using fill flash with people. You can even use your flash to fill in dark foregrounds in landscapes and to get proper exposure in your backgrounds instead of just a black hole behind your subject. Rear curtain flash exposes the background and then uses the flash to get proper exposure on a subject in the foreground. 5. Learn about Exposure and Understand It Most advanced amateur and virtually all pro cameras have a spot-metering mode. Whether you're shooting with a film or digital camera you can't capture the full range of light that your eye can see. When this wide range of light is present in a scene you'll get the best result by choosing what parts of the scene you want properly exposed. Spot meter on those areas to get exactly the image you want to create. 6. Buy a Graduated Neutral Density Filter and Use It Spot meter for the landscape and the sky washes out. Meter for the sky and the landscape becomes a dark blob.
The advantage of the circular filters is that they're small and easier to carry. They rotate so you have control over the angle of the graduation but you're limited to having the graduation somewhere near the center of the frame - which isn't optimal for every situation. Rectangular filters are the most flexible in use. The allow you to place the graduation virtually anywhere within the scene. The downside is they bulkier to carry, easier to break, and more expensive than circular filters. 7. Use a Polarizer The last one comes as a surprise to a lot of folks. You don't think of fur as being reflective, but a polarizer, especially a warm polarizer, can make a big difference in your wildlife photography. It will deepen the colors in the fur and bring out definition where there was none before. 8. Spend Time on Composition
While you're doing all this keep an eye on the light. Is it changing? What's happening with the clouds? That shot you took a moment ago using a log as a leading line might take on a whole new character as the light and clouds shift. 9. Start Printing Your Own Images Printing is also a learning process. Six months after you start printing you'll throw all of your early prints into the trash. While non-photographers may think they're perfectly fine your standards and abilities will have changed dramatically. 10. Screw Off, Have Some Fun |
|
|
|
|
|
|
|
|
|
 The
biggest mistake that photographers make is to allow too much dead space in
the frame. If you're taking a picture of a person zoom in tight and fill
the frame with that person. After all they're the subject, the background
isn't. And don't be afraid to crop out some of the person either. Take a
look at any magazine or glamour shot. Often you'll see part of the
subject's head/hair is cropped out. This focuses the viewer's attention on
the subjects eyes and creates a more intimate portrait.
The
biggest mistake that photographers make is to allow too much dead space in
the frame. If you're taking a picture of a person zoom in tight and fill
the frame with that person. After all they're the subject, the background
isn't. And don't be afraid to crop out some of the person either. Take a
look at any magazine or glamour shot. Often you'll see part of the
subject's head/hair is cropped out. This focuses the viewer's attention on
the subjects eyes and creates a more intimate portrait. Nothing
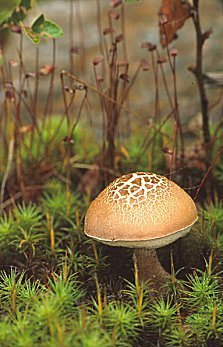
confuses new photographers more than the subject of f-stops. The f-stop
setting simply controls the size of the lens opening when you press the
shutter. By varying the size of the lens opening you can control what
parts of a picture are sharp. This is called depth of field.
Nothing
confuses new photographers more than the subject of f-stops. The f-stop
setting simply controls the size of the lens opening when you press the
shutter. By varying the size of the lens opening you can control what
parts of a picture are sharp. This is called depth of field.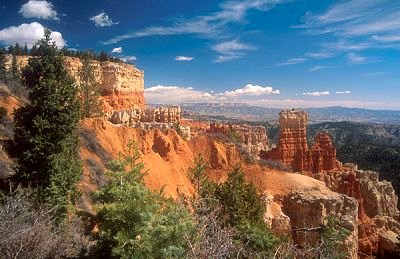 The solution is a graduated neutral density filter. They're available
as a round or a rectangular filter and are measured by how many stops of
exposure difference there is from the darkest to lightest areas (2 stop, 3
stop, etc.). They allow you to "cheat" and get proper exposure
for both light and dark areas so the final image looks like what your eye
actually saw. Since they're graduated they fade gradually from dark to
light making their use impossible to detect in the final image.
The solution is a graduated neutral density filter. They're available
as a round or a rectangular filter and are measured by how many stops of
exposure difference there is from the darkest to lightest areas (2 stop, 3
stop, etc.). They allow you to "cheat" and get proper exposure
for both light and dark areas so the final image looks like what your eye
actually saw. Since they're graduated they fade gradually from dark to
light making their use impossible to detect in the final image.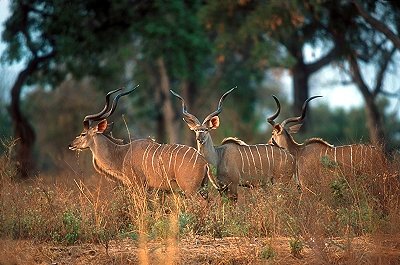 A
polarizing filter cuts glare and reflections. Use it to cut the
reflections on the surface of water, remove the glare from windows, and to
deepen the colors of landscapes and in the coats of animals.
A
polarizing filter cuts glare and reflections. Use it to cut the
reflections on the surface of water, remove the glare from windows, and to
deepen the colors of landscapes and in the coats of animals.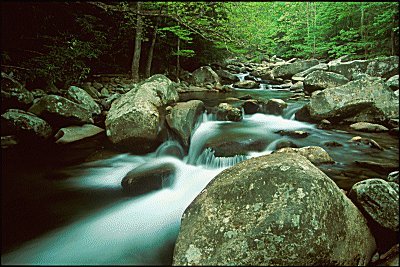 Try
different angles and different focal lengths. Walk into the scene and see
how it changes your perspective. Get down low, climb up high, look for
framing elements, leading lines, and open vistas.
Try
different angles and different focal lengths. Walk into the scene and see
how it changes your perspective. Get down low, climb up high, look for
framing elements, leading lines, and open vistas.