|
|
|
|
|
|
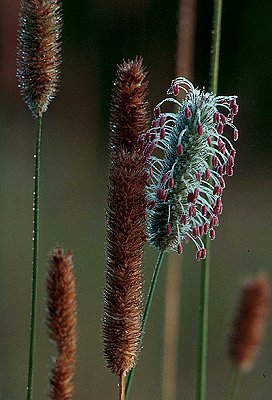
| Closeups in Nature by Mitch Moraski
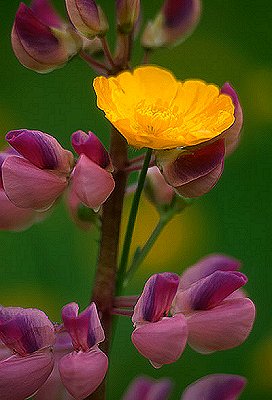
But no matter the strain, I find this kind of nature photography truly rewarding and interesting. There's no need to travel to exotic locations. You can capture great images in a nearby park or state forest even in your own yard! It's surprising how diverse the subjects are that you can find so close to home.
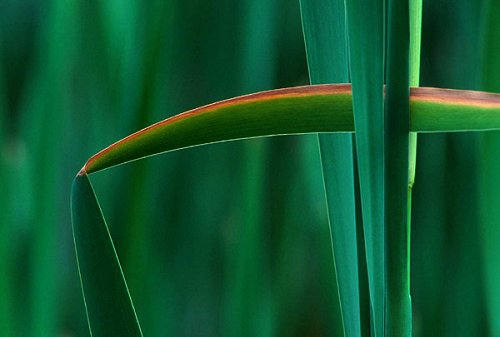
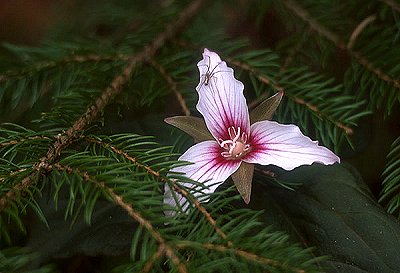
Personally I enjoy all types of macro photography from wildflowers to shooting patterns and designs. So in this column we'll talk about the equipment used in capturing close-ups in nature. There are three basic types of equipment you can use for macro photography:
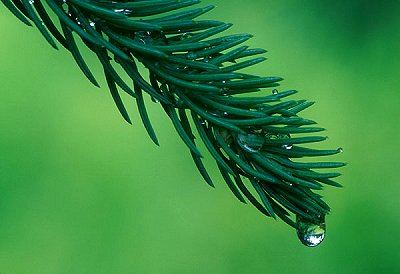
A True Macro Lens - Macro lenses usually come in 50mm to 90mm or 100mm to 200mm range and they have their advantages and disadvantages, the chief disadvantage being cost. True macro lenses typically cost $500 to $750 or more. Very pricey indeed! True macro lenses are typically fixed focal length (non-zoom) lenses. That means if you want to increase or decrease the size of your image on film, you have to physically reposition your tripod, which literally can be a pain in the neck! Their chief advantage is they offer up to 1:1 reproduction (in other words the image on the film is life sized). Another advantage is you have a two in one lens. That 200mm macro lens can also be used as a high quality 200mm lens for general purpose shooting; it's a great focal length for portraits, landscapes, or even large game wildlife photography. As a matter of fact if I were to choose a macro lens strictly for close-up work my choice would be the 200mm as it allows for greater working distance from the subject to film plane. This is important when photographing a dew covered butterfly or water droplets on wildflowers and you don't want to disturb your subject.
The advantage of extension tubes is their cost. A full set of extension tubes usually costs around $120. I recommend using them with a zoom lens in the 70mm to 300mm range. This allows you to recompose your image without having to move your tripod or yourself. By zooming in and out, you can increase or decrease your image size on the film plane. All that's left to do is refocus. But there are trade-offs with everything and light loss can be an issue with extension tubes. A 50mm extension tube will decrease your exposure by one full stop. The more extension tubes used the greater the light loss. The upside is the TTL metering system built into your camera will recognize this and adjust accordingly. Unless you're using an old manual camera there's no math for you to do! Extension tubes can be stacked one upon the other for greater magnification. Because extension tubes create a macro environment, your ability to focus to infinity is now nonexistent. If an extension tube is in place and you happen upon a moose 50 yards away you won't have the luxury of focusing on him or her because of your reduced focal distance. In other words your maximum and minimum focusing distances become extremely compressed when using extension tubes.
Costs can vary depending upon the filter diameter and manufacturer. A 52mm Nikon 3T two-element diopter has a street price of around $30, though I have seen them as high as $100.00 to $125.00 for filter sizes up to 72mm. The chief advantage of a diopter over extension tubes is that light loss is at a minimum, only about 1/3 of a stop is all that's lost, adjusted for by your TTL metering system. Unlike extension tubes, you can increase and decrease your image size using a zoom lens and you won't need to refocus. I'm often asked if you can use extension tubes with a diopter. The answer is absolutely. They are two separate elements in performing two distinct functions on your lens. Extension tubes and diopters along with a medium range zoom lens are the most efficient and economical way to capture macro images. I highly recommend going this route versus a fixed focal length macro lens. You won't be disappointed and the money you save can go towards a sturdy and reliable tripod.
Exploring the unique and interesting world of macro photography will add a whole new dimension to your nature photography and just think what you'll save on gas and airfare!
|
|
||||||||
|
|
|
|
|
|
|
|
|
 When
asked about photographing close-ups in nature, my first response is you
need good knees and a strong back, you should expect to get wet and be
prepared to twist yourself into lots of awkward positions. I'm not trying
to discourage anyone from trying macro photography, but it really can be
quite strenuous - especially after forty!
When
asked about photographing close-ups in nature, my first response is you
need good knees and a strong back, you should expect to get wet and be
prepared to twist yourself into lots of awkward positions. I'm not trying
to discourage anyone from trying macro photography, but it really can be
quite strenuous - especially after forty!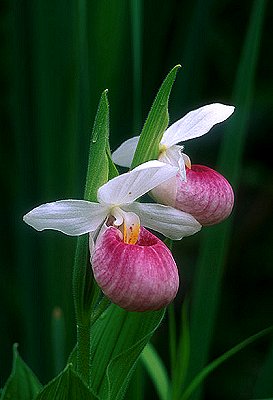
 Extension
Tubes - Extension tubes are nothing more than hollow tubes ranging in
size from 12mm to 50mm. They can be purchase individually or as in a set
of three. The tubes are placed between the rear lens element and the
camera body. By adding extension tubes you can convert a standard fixed
focal length lens or zoom lens into a macro lens.
Extension
Tubes - Extension tubes are nothing more than hollow tubes ranging in
size from 12mm to 50mm. They can be purchase individually or as in a set
of three. The tubes are placed between the rear lens element and the
camera body. By adding extension tubes you can convert a standard fixed
focal length lens or zoom lens into a macro lens. Diopters
- Diopters are filters that screw onto the front of the lens like any
other filter. The greater their power, the greater their magnification. I
happen to own a Nikon 3T two-element diopter filter. The key here being
two element. Two element diopters are optically much sharper than single
element diopters. I highly recommend staying away from the inexpensive
three filter kits that you sometimes see advertised. They are usually
designed with low-grade glass and will only degrade the sharpness of your
images.
Diopters
- Diopters are filters that screw onto the front of the lens like any
other filter. The greater their power, the greater their magnification. I
happen to own a Nikon 3T two-element diopter filter. The key here being
two element. Two element diopters are optically much sharper than single
element diopters. I highly recommend staying away from the inexpensive
three filter kits that you sometimes see advertised. They are usually
designed with low-grade glass and will only degrade the sharpness of your
images.