Contax G2:
The Ultimate Travel Camera?
by Jim McGee
 Wouldn't
it be great if you could have a camera the size of a point and shoot that
had fast sharp interchangeable lenses, autofocus, fast shutter speeds, an
accurate meter, and the ability to work in any mode from full auto to full
manual? You could slip it in your pocket and it would be the ideal camera
for travel and street shooting. Wouldn't
it be great if you could have a camera the size of a point and shoot that
had fast sharp interchangeable lenses, autofocus, fast shutter speeds, an
accurate meter, and the ability to work in any mode from full auto to full
manual? You could slip it in your pocket and it would be the ideal camera
for travel and street shooting.
It's not a fantasy. The Contax G2 is that camera. This wonderful little
interchangeable lens rangefinder does all that and more and you can buy it
today - albeit at a pretty significant price.
Browse through a catalog and you might think the G2 is similar to a
Leica M7. But that couldn't be further from the truth.
There are similarities. They are both
finely crafted 35mm range finders. They both have excellent optics and
they both have prices that can take your breath away.
 But they are the
product of two completely different design philosophies. So much so that
after having shot with both I'd say they have almost nothing in common.
Where cameras from Leica are like a time warp the Contax G2 is a
thoroughly modern camera in every way.
But they are the
product of two completely different design philosophies. So much so that
after having shot with both I'd say they have almost nothing in common.
Where cameras from Leica are like a time warp the Contax G2 is a
thoroughly modern camera in every way.
The little Contax has a beautiful brushed Titanium body that makes no
effort to look like something from the past. Pick it up with a 45mm
lens attached and its two pounds of heft convey instantly that this is no
point and shoot. A contoured plastic grip is molded around the right side
of the camera front and rear to provide a good hold. The major controls
are arrayed around that right side grip and all fall easily under your
fingers. With a little familiarity there's no reason to pull your eye from
the viewfinder to change settings.
Pop the back by pulling down and turning a release lever. Film loads as
it does in any modern camera and is automatically advanced to the first
frame and it will keep advancing the film at up to 4 frames per second as
you shoot. There's no film crank here.
The camera reads the DX code and sets the ISO automatically.
There was even thought put into the camera strap. The small rings with
leather covers are the only part of the camera that harkens back to the
past. But Contax has thoughtfully included a small tool that makes it easy
to slip the rings onto the nubs on the camera.
The specs are pretty impressive for such a small package. Take the
shutter for example, there is nothing retro about it. The shutter is an
electronic, multi-bladed, composite, vertical travel precision shutter
offering stepless shutter speeds from 16 seconds to 1/6000th with a flash
sync at 1/200th. There is even a rear sync flash mode (with Contax TLA 280
or TLA360 units). There's even a sync terminal for use with studio flash.
Look through the viewfinder and you notice it's bright and clear. For
those who no longer have perfect vision a diopter control puts things to
right. The range finder couples to the lens to compensate for parallax.
Nowhere in the manual could I find a spec for the viewfinder coverage.
Let's just say that a generous amount of image is captured outside what
you see in the viewfinder. At least that was the case with the 45mm and
35-70mm lenses we had.
 Autofocus on a rangefinder felt really odd the first time I used it, as
I tend to associate rangefinders with all manual functions. But the
autofocus on the G2 was quick and responsive even in low light. The only
fault I'd find with it was that it was a touch louder than I'd expected -
though not so loud that I would expect anyone to notice. Autofocus on a rangefinder felt really odd the first time I used it, as
I tend to associate rangefinders with all manual functions. But the
autofocus on the G2 was quick and responsive even in low light. The only
fault I'd find with it was that it was a touch louder than I'd expected -
though not so loud that I would expect anyone to notice.
You have a choice of exposure modes including Aperture Priority (Auto),
manual and Bulb. As is my habit I did the majority of my shooting in
aperture priority. Over and under exposure is easily set to plus or minus
two stops in one-third stop increments using the dial on the top deck. You
can even turn on exposure bracketing in one-half or one full stop
increments using the lever under the exposure compensation dial.
In the Field
We shot slides exclusively through the G2 and we found that exposures
under a wide range of conditions were spot on. Images through the Zeiss
lenses were sharp and contrasty and the little TLA200 flash pleasantly
surprised us with it's performance (see the review of the lenses and flash
in this issue).
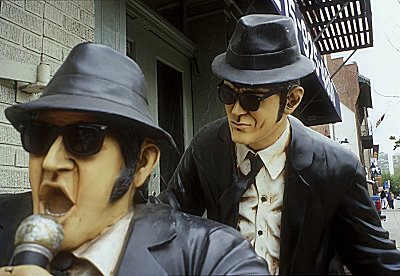
This is a great little street shooter. In terms of size it looks like
an oversized point and shoot. Non-photographers don't even notice it. The
camera with a flash and two lenses would easily fit in a fanny pack and
they just about get lost in a camera bag. And that's the whole point.
 Contax
sent along the 45mm f2 and the 35-70mm f3.5-5.6 lenses. There are seven
lenses available for the G2 ranging from a 16mm f8 to a 90mm f2.8. All are
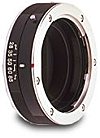
high quality compact lenses. Want to go to something longer than 90mm? You
can get the GA-1 adapter that allows you to mount Contax SLR lenses to
your G2 ($150 street price). But mounting or even carrying a big zoom
would negate the best feature of the G2 which is its small size and
weight. Contax
sent along the 45mm f2 and the 35-70mm f3.5-5.6 lenses. There are seven
lenses available for the G2 ranging from a 16mm f8 to a 90mm f2.8. All are
high quality compact lenses. Want to go to something longer than 90mm? You
can get the GA-1 adapter that allows you to mount Contax SLR lenses to
your G2 ($150 street price). But mounting or even carrying a big zoom
would negate the best feature of the G2 which is its small size and
weight.
The G2 was easy to use. The controls make sense and I never felt a need
to go back to the manual. That's a good thing too as the manual is
difficult to read. Each page contains the text in four languages. It would
be much easier to navigate if it was broken into four sections by
language.
 There are some quirks to the G2 though. When focusing manually you have
to rely on the rangefinder display in the viewfinder to tell you when the
subject is in focus. Since this is primarily an autofocus camera there are
no parallax lines to line up in the finder. Another quirk involved the
35-70mm zoom lens. The zoom ring is on the very front of the lens,
requires a healthy twist, and moves in and out as the lens zooms. When
shooting vertically with this lens you end up partially blocking the
viewfinder with your hand as you zoom in and out. It was an annoyance, but
I was gradually learning a different hand position to compensate. There are some quirks to the G2 though. When focusing manually you have
to rely on the rangefinder display in the viewfinder to tell you when the
subject is in focus. Since this is primarily an autofocus camera there are
no parallax lines to line up in the finder. Another quirk involved the
35-70mm zoom lens. The zoom ring is on the very front of the lens,
requires a healthy twist, and moves in and out as the lens zooms. When
shooting vertically with this lens you end up partially blocking the
viewfinder with your hand as you zoom in and out. It was an annoyance, but
I was gradually learning a different hand position to compensate.
Another quirk involved flash exposure. The G2 tends to overexpose
subjects close to the camera by about a full stop. Subjects more than
about three feet away are exposed correctly when using the TLA200.
But these are minor issues. All in all I have to say I enjoyed my time
with the G2.
Conclusion
Make no mistake. This is not an inexpensive camera. Both the body and the
lenses are expensive. But for someone who travels as much as I do I could
see this camera as an ideal travel companion. Its size makes it an
attractive option when compared to an SLR. It's perfect for street
shooting or for taking along in the evening when you don't want to cart a
camera bag out on the town. Its excellent lenses provide the kind of
quality I expect from pro SLR lenses. All in all it's just about the
perfect travel camera.
For just these reasons the G2 has found it's way into quite a few pro
bags. Is it the right camera for you? Well that depends on your shooting
style and budget. As I said, for me it represents just about the perfect
travel camera.
Street price on the G2 is around $1,300 to $1,350 for the body. But
it's currently available in kit form with the 45mm f2 lens and TLA-200
flash tested here for street prices of $1,400 to $1,450 which, if you're
in the market for this camera, is quite a bargain.
| Using Polarizers and ND Grads
with a Rangefinder
I tend to think of rangefinders in terms of my travel
photography. They're the camera I'll take out street shooting when I
don't want to attract a lot of attention with a big pro SLR and
they're the camera I reach for when I'm going out for dinner after a
day's shooting.
 |
|
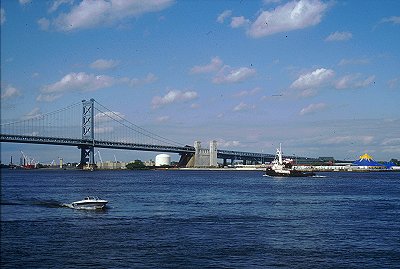
With a 35-70mm
you can only get so close. This shot represents about 20% of
the image it was cropped from. A polarizer was used to control
the reflections in the water. |
Their light weight and small size make them perfect for those
times you don't want to carry a lot of gear. But what if you want a
rangefinder as your primary camera? Or what if you're driving down
the road and you see that perfect landscape? Should you pass it by
because you can't use a polarizer or split neutral density
filter?
Absolutely not! A polarizer will work either on or off the lens.
To see its effect just close one eye and rotate it in front of your
open eye. When its providing the effect you want bring it down
slowly from in front of your eye and note the location of the
lettering on the edge of the filter. Now just hold your rangefinder
with the filter in front of the lens in the same orientation and
snap the image. That's how I got the image of the herons on
this page.
Graduated neutral densities are a little tougher. Glance through
the viewfinder and figure out where you want the filter effect to be
and at what angle. Where does that fall relative to the image in the
viewfinder? Now position the filter over the lens at roughly the
position you just estimated. Remember the filter is graduated so the
placement of the filter is not an exact science. With a little
practice you'll get good at estimating where the filter should be
relative to the front of the lens. You'll still miss one now and
then - but its better than not taking the shot at all isn't it?
|
 Subscribe to
Vivid Light
Subscribe to
Vivid Light
Photography by email
Tell
Us What You Think
|
