|
|
|
|
|
|
| Bird Photography Southwest Florida Style
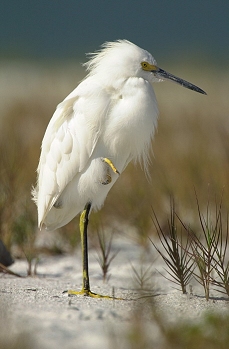
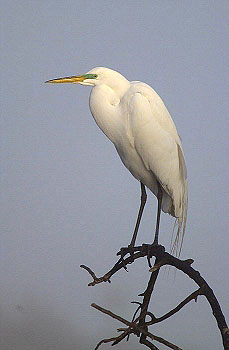
The variety of birds found along the coast of Lee County centering around Ft Meyers is simply staggering! Simply driving in from the Ft Meyers airport into town, you can see Wood Storks foraging on the shore of the lake along with Roseate Spoonbills, Great and Snowy Egrets, Great Blue, Black-crowned, Yellow-crowned, Green, Little Blue and Tri-colored Herons. All this and we haven't even reached the good spots yet! So travel with me for a moment to a land blessed with birds and learn some of the ways you can explore this paradise and come back with some of the best bird photographs of your life! Equipment Basics Before packing up your sunblock and shorts, you need to go to Florida ready for bird photography. While it sounds obvious, there is basic camera equipment you need to obtain in order to have a fun and successful trip. While I shoot digital, lens selection is still an essential element in bird photography success. So here are my thoughts on lens selection for Florida birds. Lenses for bird photography are pretty specific. The minimum you should start with is a 400mm lens that can be a straight 400mm lens, or a 300mm lens with a 1.4x teleconverter (giving you a 420mm lens). Getting real serious about it, you might venture up to Nikon's or Canon's 500f4 or 600f4 lenses. There is a big difference in these four lenses in price and weight, both important factors to your photographic success. The 300mm and 400mm lenses are smaller and easier to handhold, which is essential for bird flight photography. Their price is also not astronomical. The Nikon 300f4AFS that I use can be found for less than $700 around the country. Canon makes a beautiful 400f5.6 Ultrasonic (has its own internal motor) that is a killer lens for bird photography that sells for just over a $1000. Both of these lenses have produced magnificent images for myself and for Arthur Morris over the years.
When you move up to the big guns, the 500f4s and 600f4s, you move up to more weight and a bigger price tag. These lenses start around six thousand and work their way up from there. Their weight is also substantial, requiring a sturdy tripod because they cannot be handheld. Both Arthur and myself use 600f4 lenses, Arthur the Canon 600f4 IS and I the Nikon 600f4 AFS. Because of our style of photography, we tend to use the 1.4x teleconverter with these lenses, giving us 840f5.6 lenses. We don't add the teleconverter so we can photograph a bird a mile away (as we're typically just sixty feet or less from our subject). We use this focal length because of its narrow angle of view, providing us with incredible control of the background which is essential. It's interesting to note that even though we both shoot with these big guns, we always have on our shoulders a second body with a 400mm lens attached, for those birds flying by overhead. The tripod used to support those big guns is also an essential piece of equipment. The last place to cut corners in your camera equipment is the support for those ten thousand dollar lenses. Gitzo makes an incredible line of tripods, I prefer their newer Carbon Fiber 1348 and 1548 tripods. The reasons are many. The first reason is weight which is critical now a days when flying by air. The 30% weight reduction of these tripods compared to their metal counterparts makes a big difference when in transit. This loss of weight also makes a big difference when you have a big 600f4 and camera body attached to the tripod, especially carrying it down the sands of Ft Meyers beach while chasing birds! The Carbon Fiber tripod is also better equipped to deal with the environment. You'll find out shortly that on the beaches of Florida, we go right into the water to photograph the birds. This requires not only the right techniques, but also a tripod that can deal with the salty, watery environment. I have found the Carbon Fiber tripods are marvelous for this application. On the complete opposite side of environmental conditions, the Carbon Fiber tripods work great in cold country as well because they do not take on that bone chilling cold that tends to freeze our hands when shooting with metal tripods. The equipment you use to transport all your precious camera gear to and around Florida is just as essential to your success as the camera gear itself. I have found only one real solution to my gear transportation needs, that's the Pro Trekker backpack from Lowepro. In these days of tightened airline carry on requirements (as you never want to check in your camera gear), the Pro Trekker is a blessing. Fully loaded, and I mean loaded with: 2-D1H bodies, Nikon 600f4 AFS lens, 300f4AFS, 24-85AFS, 17-35f2.8AFS, Nikon TC-14e teleconverter, Nikon 14f2.8 lens, SB-80DX flash units and miscellaneous cords and stuff, the Pro Trekker still fits under the seat or in the overhead! The beauty of the Pro Trekker doesn't stop there. Because once you're on location, you can easily carry the Pro Trekker (provided you can pick up all that weight) like a backpack, taking it anywhere. Its rain tight construction even takes care of you during one of those brief afternoon thunderstorms (with an extra built-in cover for heavy down pours)! Now you might not have all the gear I've listed but want the portability and protection of a Lowepro bag, not to worry as they have many to cover your individual needs. For example, if you have just a Canon EOS1n, 400f5.6 Ultrasonic and a couple of other lenses and flash, the Lowepro Mini Trekker or Nature Trekker would suit you perfectly!
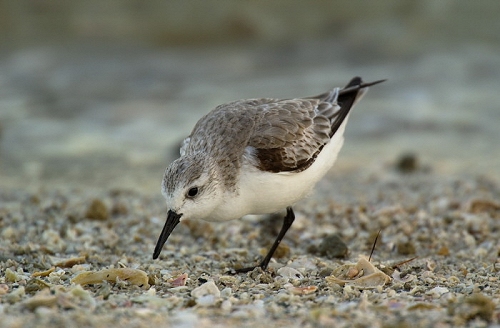
But enough of these equipment basics! Let's put them to use as we get our toes wet in the surf of Southwest Florida and go photograph some birds! This is when the fun really begins! There are many bird photography locales in Lee County, but there are two locales that really rock and roll for bird photography, Ft Meyers Beach and Ding Darling National Wildlife Refuge on Sanibel Island. These two locales provide you with tons of fun, great bird photography and the opportunity to test, practice and perfect all the basic techniques for bird photography. So lets get going, I can't wait! Ft Meyers Beach This glorious long stretch of Florida sand is a treasure trove of bird photography. It does have its drawbacks though: you must cover yourself with sunblock, walk in the sand and play in the water. So if you can handle that, you're assured some of the best bird photography you might ever experience! The basic equipment setup for Ft Meyers Beach is a single body and 400mm lens. I prefer to venture out on the sand with my D1H mounted to the 600f4 with 1.4x atop my Gitzo 1548. I have a second D1H with the 300f4AFS on my shoulder. I will have a fanny pack with extra batteries and flash cards. The last thing I make sure to have are old shoes on my feet. There are tons of shells on this beach, making it a heaven for beachcombers. But the small pieces of broken shell can be murder if stepped on; and when watching birds, one tends not to watch where one places their feet. Now there are a couple of techniques for working in the sand and water with a tripod. The main one has to do with securing the stability of the tripod in the sand. You want to work between two of the three legs of the tripod, this means that one leg of the tripod is always directly in front of you. When you set down your tripod, be it in dry or wet sand, you want to push down on that front tripod leg. Not hard, but push enough to break the surface of the sand to secure the tripod. That little push makes a big difference in capturing sharp images. With all that in mind, we'll venture down the beach. I prefer strolling the beach early in the morning when the birds are just starting to forage for the day. Watch carefully and walk slowly, because you never know what little pip might pop out of a sand dip. Wilson's, Semi-palmated, Snowy and the endangered Piping Plover all scurry about the sand looking for insects to munch. These little critters along with sandpipers like the Willet, Marbled Godwit, Long-billed Dowitcher and Red Knot all make for great photographic opportunities. You'll find that with a 400mm lens, you'll need to be a maximum of twenty feet away and with a 600mm around thirty feet away from these little guys to capture a nice image. Getting that close to these small pips can be tricky. I have found that by holding still where the pips are foraging, they will come closer to you on their search for food. You just need to be able to soak up a little sun awhile until they get close enough to photograph. Whether the tide is heading in or out, there are typically small straits and islands of sand left in the very shallow water. These become the temporary homes of the Brown Pelican. These magnificent birds are great subjects! Getting close to them requires your moving to them, sometimes over sand and other times through the water, which is not a problem as it's knee high at most. Slow and easy is required to get close. You want to look for the adult birds; typically they have a darker brown head with yellow patch. With the sun on your back so the subject is front lit, getting close to shoot a vertical portrait can make for one stunning image! It is important that you use proper technique when shooting, both handheld and with that big gun on a tripod. When shooting handheld, make sure the lens is resting in the palm of your left hand, elbows are tucked in and the camera is pressed against your forehead. With that long lens, rest your left hand on top of the lens barrel directly over the tripod head and again, press you forehead against the camera. These simple techniques assure you don't have images out of focus because of camera movement.
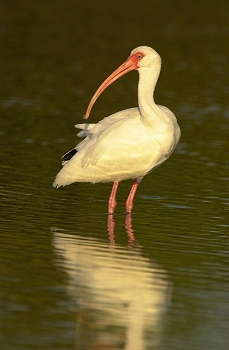
Continuing on our walk down the beach, we come to the lagoon in front of the Holiday Inn. This is a great place for photographing some magnificent birds. You'll probably first come upon the Little Blue, Tri-colored Heron and Reddish Egret foraging for small fish in the shallows. I have spent weeks in this spot, absolutely having the time of my life photographing these birds! The Little Blue and Tri-colored Heron fish with a very patient style. They walk slowly in the water, shuffling their feet to stir up any little fish resting on the bottom. With that accomplished, they poise to strike and then lunge to grasp their prey. The egret on the other hand is a panic to watch. The Reddish Egret has two styles of fishing. The first is the panic method, where it chases everything and anything through the water. It does this by a half run, half flight methodology that has to be seen to be believed. The other method is sheer poetry in form as the egret creates an umbrella out of its wings and shades the water, which attracts the fish to right under its beak. Any and all of this activity makes for great photography, but you best have your energy pills ready because they will work you up and down the beach. In this same area is a special Reddish Egret, a white phase of the species. This individual has been around this lagoon for as long as I've been coming here and is very easy to approach and as you can see from the photographs, very photogenic! Along the shores of the lagoon and in its waters are many other species to be enjoyed and photographed. White Ibis come to these waters to forage, sometimes in large numbers. On a still, clear morning with blue skies, photographing their white bodies and red bills while incorporating their reflections is a real heart stopper. American Oystercatchers roam these same shorelines, their dramatic plumage colors make them a real stand out. At low tides when the ribbons upon ribbons of shells line the sand, you can find them plying open the shells looking for a meal, making for great photography. That brings up another great photographic technique.
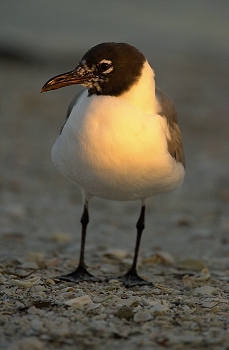
We tend to photograph most birds from eyelevel which is fine the majority of the time. Doing this on the beach though might capture more "beach debris" than you might want. Shells, sea weed and the like can be a distracting background and no matter how much you try to limit depth-of-field by opening up your lens, you'll still capture it. The best way to eliminate unwanted elements in the fore and background is to lay down on the sand and shoot. If you're handholding your lens, this is easy. For those big guns, you can simply rest the lens' tripod collar in the sand and shoot (brushing off the sand when done). This very simple but effective technique dramatically improves your bird photography. (Please don't try this technique in the Everglades though; your subjects might eat you there.) Finally when shooting at Ft Meyers Beach especially at the lagoon, look up! Double-crested Cormorants, Royal, Sandwich and Common Terns, Laughing and Ring-billed Gulls, Brown Pelicans and Ospreys fill the skies with sight and sound! It has never failed that when I was standing on the shore of the lagoon, an Osprey literally dropped by to grab a fish from the lagoon. On one occasion, the Osprey caught a fish bigger than it could carry so it "swam" to shore to eat the fish right in front of us! Ah, the bird photography here is just indescribable, you've got to experience it for yourself! There is a technique you need to be aware of when photographing action, in this case flying birds, called panning. This is a basic technique requiring that you continue to track the subject through the viewfinder after the exposure is finished. If you're shooting handheld, you twist at the trunk to move and track the subject through the viewfinder. If shooting with a big telephoto on a tripod, you swing the lens to track the subject. In either case, when photographing a bird in flight, you follow it in the viewfinder. When it looks sharp and has a nice background, you fire the camera. During the making of the exposure and afterwards, you continue to follow the subject in the viewfinder. By doing this, you capture a sharp image of the subject but blur the background, heightening the feeling of movement in the final photograph. If you want the wing tips sharp, use as fast a shutter speed as you can. If you want to blur the flapping of the wings to communicate flight more, use a shorter shutter speed such 1/60 or slower.
Ding Darling National Wildlife Refuge Called the jewel of the national wildlife refuge system, Ding Darling is a mecca for bird photographers and watchers alike from around the world! A dike road takes you on an adventure through the mangrove swamp where birds and alligators abound in this paradise. Many come for the morning spectacle, but I like Ding Darling anytime of the day. In the early morning, typically at the third pond as you travel the one-way road is a spectacle in nature you've got to witness! Here the Roseate Spoonbills flock. Their bright pink plumage in the blue water and clear Florida sun create a photographic image screaming to be captured for eternity on film! Parking on the side of the dirt road and walking all of ten or fifteen feet to the shore of the pond, with your handheld 400mm or bigger telephoto, you stand and once you get past the awe, you start photographing the event. It's easy to be carried away by the splendor and forget the photography, but this is the time to be on top of your game. Take shots of the flock, but then start focusing in on one or two individuals. There are adults and youngsters in the flock; the adults have the brighter pink plumage and dark red wing band. The adults are the ones to concentrate on, if at all possible, their color burning a hole in the film's emulsion! The Roseate Spoonbills can be quite animated, busy foraging, preening, socializing and moving about. All of this makes for incredible photographic opportunities you don't want to miss!
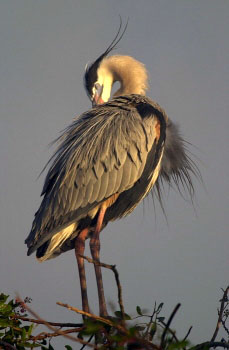
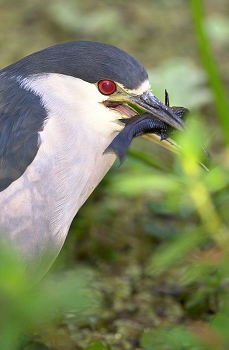
In what seems to be a very short time, the spoonbills take off to their other morning haunts, leaving you to concentrate on other birds at Ding Darling. Many of the typical Florida wading birds are present: Great Blue, Little Blue, Tri-colored, Green, Black-crowned and Yellow-crowned Night Herons, Great, Snowy and Reddish Egrets, White Ibis, White Pelican, Wood Stork as well as shorebirds and ducks abound at the refuge. The third pond, which you'll know by the big tower, is one of my favorite places to hang at Ding Darling because of this incredible collection of birds. You can walk up and down the shore of the pond and get what seems as if within inches of these birds as they go about their daily lives. One of the keys to making the most of your morning shoot at Ding Darling is to be shooting with the sun on your back so the subject is front lit. You want to move, sometimes very slightly to the left or right, up or down to eliminate distractions in the background. This small adjustment can radically improve your photograph, making the subject "pop" visually in the photograph. You also need to watch other birds in the background as well the ducks especially seem to be in the wrong place at the wrong time.
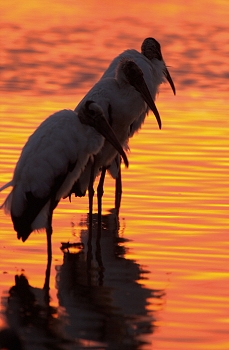
You'll find a dike on the south end of the third pond that is a must to walk in the morning. This very short walk can provide some stunning images if you go with a discerning eye. The birds at Ding Darling are pretty habituated to humans, but those along this walk are especially use to folks, so getting close is a snap. Success here just requires your watching that background because the mangrove roots are thick in some spots and can really clutter up the background. Also, take in the ordinary not just the spectacular. For example, the Double-crested Cormorants sometimes perch along the canal. In their breeding plumage, they are spectacular subjects. Their blue eyes and eyerings are hard to pass by. Don't let their overall black color scare you off. Late afternoons at Ding Darling are a marvelous time for producing more artistic images. Standing by the tower for a half an hour or so before sunset you'll see the Roseate Spoonbills fly back into the pond. The warm afternoon sun, the darker blue sky and the flaming pink of the spoonbills make for incredible images. Standing there with your handheld 400mm lens capturing great images couldn't be any easier! Turing your attention back to the pond, you'll see a gathering of birds like you could never imagine. Every wading species in Florida is present in an evening feast, mingling, foraging, socializing, interacting in wave after wave of color and form. With the sunset glowing in the background, the water is set ablaze with its color and the birds go about their last chores for the day. It's hard to believe what you're seeing with your eyes and the camera lens could be true. You can literally point your camera anywhere and capture the image of a lifetime! Once you've experienced it you'll be hooked for life on bird photography!
Wow, our trip is finished already and we've only just begun! While we've visited just two of the many incredible locales Southwest Florida has to offer the bird photographer, there's so much more to experience. Just north of Ft Meyers is the famous Venice Rookery, which in the spring, is a must for every bird photographer for the nesting Great Blue Herons and Great Egrets. Just south of Ft Meyers is Audubon's Corkscrew Swamp Sanctuary. This treasure amongst the Bald Cypress is so full of birds and bird photography, you could explore it for a lifetime and never capture it all. But that's the whole point, getting out and exploring and enjoying the birds of Southwest Florida. I hope you visit real soon and if you see a beach bum lying on the sand with a big lens, I hope you stop and say hello! |
|
|
|
|
|
|
|
|
|
|
 It's winter and we have five feet of snow
on the ground. While I love exploring my backyard on snowshoes or
cross-country skies, there's another winter activity I love just as much.
Whether you're a bird photographer, bird watcher or want to see what all
the excitement is all about, venturing to Southwest Florida is like
visiting bird heaven! While I've traveled the country with my camera in
the pursuit of its best bird photography, I find myself constantly heading
back to the treasures of the gulf coast of Florida. If the lure of its
white sand beaches, blue skies and warm sun isn't enough, the collection
of birds in some of nature's best settings has to be!
It's winter and we have five feet of snow
on the ground. While I love exploring my backyard on snowshoes or
cross-country skies, there's another winter activity I love just as much.
Whether you're a bird photographer, bird watcher or want to see what all
the excitement is all about, venturing to Southwest Florida is like
visiting bird heaven! While I've traveled the country with my camera in
the pursuit of its best bird photography, I find myself constantly heading
back to the treasures of the gulf coast of Florida. If the lure of its
white sand beaches, blue skies and warm sun isn't enough, the collection
of birds in some of nature's best settings has to be!