|
|
|
|
|
|
| The Scariest Article Ever!
You see, I don't do macro! Moose getting down is just not an option for everyday photography. But I thought that perhaps in my challenges to get down and up close, I might find some answers for you while I try to find some answers for myself. The answers I found don't come from some new technology or piece of equipment, but rather use of trusty old standards the great macro photographers have been using for a decade.
Macro lenses are the easiest and most common way to conquer image/subject size. Many manufacturers offer a line of macro lenses. They are typically in the range of 60, 90, 105 and 200mm. The trick in selecting the right one comes down to two criteria, reproduction ratio and physical working distance. Reproduction ratio is the relationship of image size to subject size that I just described. In this day and age most lenses permit you to go 1:1 without any extra additional accessories. This is definitely the way to go in my opinion (I like easy when it comes to scary things!). I actually own a macro lens, the original 60f2.8 macro that goes 1:1 (It doesn't get much use). I have shot with all of them though because there is one other important consideration to take into account when selecting the right lens that I wanted to learn about first hand. That's working distance.
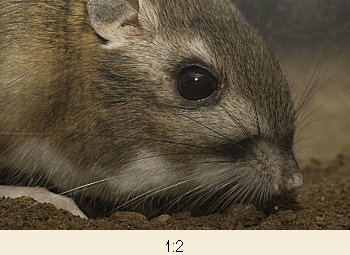
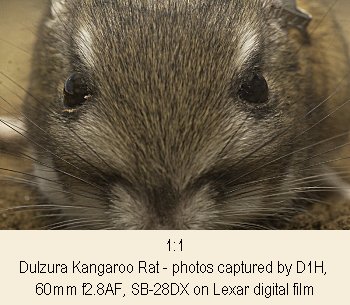
The shorter the macro lens is the shorter the working distance. For example, the 60f2.8 is physically only six inches away from the subject when it's focused at 1:1. On the other hand, the 200f4 macro when focused 1:1 has a working distance of nearly two feet! This can be incredibly important in your attempts to light your miniature subject. It can also be important if you have a shy subject. If your getting close could possibly scare away your subject than getting close physically might not be an option. While the longer lens provides you with greater working distance, it makes it more difficult to go beyond 1:1 reproduction. The rule with normal lenses (a rule some macro lenses break with their design) is you must add equal amounts of extension to the focal length of the lens to reach 1:1. With a 50mm lens, you need 50mm of extension to reach 1:1 and 100mm of extension to reach 2:1. With a 200mm macro lens, you need to add 400m of extension to reach 2:1 reproduction. That's just not an option. On the positive side though, the Nikkor 200f4AF macro (a beautiful lens) goes to greater magnification with the use of teleconverters. This brings us to our next method of increasing image size for a small subject, extension tubes. With many of the newer macro lenses, extension is built in with either optics or air gap. Extension tubes are meant to do one thing, increase the air gap of the lens. By moving the lens away from the film plane, you increase its ability to focus closer. By using the formula above, moving the lens away the equal amount as its focal length is how we reach greater magnification. In theory you could use a paper towel tube to do macro photography but in reality we use the extension tubes manufacturers offer. If the maker of your camera system doesn't offer extension tubes you have to turn to Kenko for extension tubes. The last method to reach macro is with "accessory lenses" also known as close up lenses. These are optics, some cheap and some great quality ones that "magnify" the image with their optical formula. Some, such as Nikon's "T" series are actually true multi optic elements, which deliver the quality required for reproduction. Less expensive optics are a mere single piece of glass, which while they do the same magnification job, produce quality that is less than desirable. Getting Down With your lens, extension tube and/or close-up lens at the ready, it's time to make big of the small. There are really a number of ways to go about this, for me it meant getting down and shooting. I follow the traditional and the untraditional to my new look at macro photography. Traditional for me means putting the 60f2.8AF macro on the D1H and going shooting. I took on some small mammals for this assignment. I had the opportunity to photograph a couple of endangered critters close up. The subject, who is not much bigger than your thumb was never more than nine inches away. My setup was simple, D1H, 60f2.8 with SB-28DX. Light is an essential part of photography and with macro it's even more critical as you're working in such tight quarters. Getting the image size I desire simply required getting closer to my subject. Physically getting close meant moving only inches but in the world of macro inches is the name of the game. A constant light source like that provided by the flash makes all the difference in the world for consistent lighting. I personally like using the SB-28DX with its built-in white bounce card because of the quality of light it puts out. Using TTL flash makes dealing with depth-of-field a lot easier. Depth-of-field (DOF) is a challenge because the greater the magnification the greater the DOF that is required to keep things sharp. For my photos I normally shoot around f/11-f/16 to maintain the same DOF as I changed from 1:4 to 1:1. The greater the magnification, the greater the DOF requirements. There is another method I like to use for macro, which fits my limited style better than the traditional method. I LOVE doing macro with my pocket digital camera! The vast majority of digital pocket cameras have a macro mode, setting the camera to that mode opens up a whole new world! One of the coolest features with this method of macro is you don't have to get down!
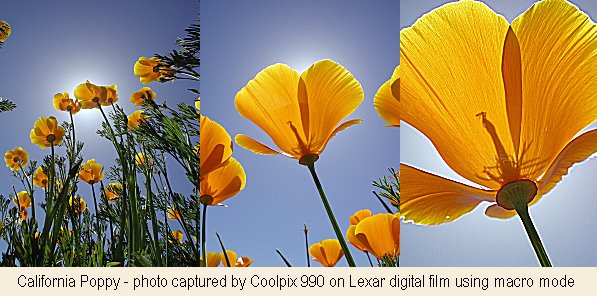
Working with a digital camera, you can utilize the monitor to immediately see the photograph you're setting up. The poppy photograph is a great example. Because I was using the digital pocket camera, I could set the camera on the ground, point it up to photograph the poppy from a bug's eye point of view and see all of my composition while standing up. That's because I was using the camera's monitor to compose. Another benefit is these cameras autofocus so you can concentrate on the subject rather than the technical aspects.
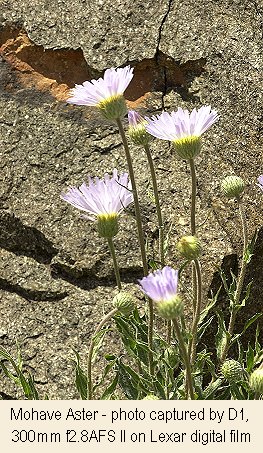
You don't have to use a 60mm for close-ups of wild flowers. Take it from a guy who doesn't like to get down low; there is more than one way to skin a cat. A typical setup for me is my 300mm f4 AFS with a 25mm extension tube. This permits me to have a really nice working distance while getting really tight magnification. Wide Angle Macro 1 on 1 What did I learn from Jim's idea of an article? I learned that macro techniques have not changed much from twenty years ago except for the introduction of TTL flash. I found that I can do it easier with the pocket digital camera but more to the point, Moose just isn't a macro photographer! All that work for a teeny tiny subject that often is not moving scares the heck out of me. I love macro photography, that is, when I can enjoy looking at the images of the masters. I'm not one of them. I understand the process and I have the tools but I just don't have the passion to go one on one!
|
|
|
|
|
|
|
|
|
|
|
 This
month's article is not one I thought of, but something Jim asked me to
write. It has to be one of the scariest topics I have ever had to write
on, macro photography!
This
month's article is not one I thought of, but something Jim asked me to
write. It has to be one of the scariest topics I have ever had to write
on, macro photography!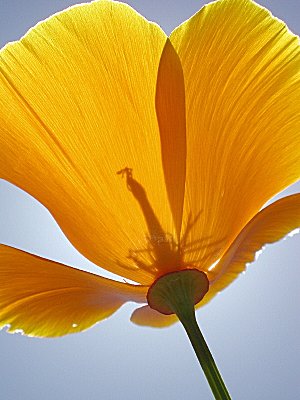 Size
Size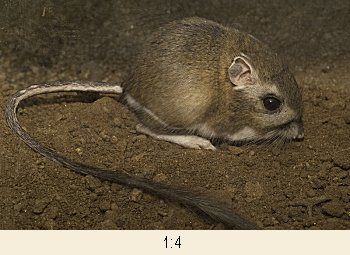
 Slight
Variation on Macro
Slight
Variation on Macro 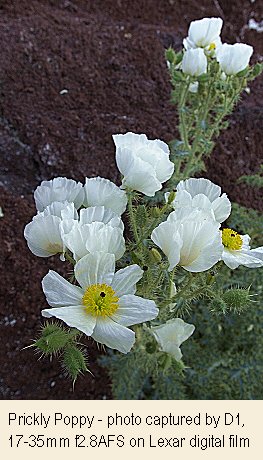 I have to come clean. My idea of a macro lens is my 17-35f2.8AFS ultra
wide angle zoom. I guess part of my problem with doing macro is that I'm
only depicting a small part of the subject in the frame, eyeball
photography as it were. I prefer showing the world in which the subject
lives in my images. To do that in the macro realm, I shoot most often with
my ultra wides, getting really close physically to make the subject pop
while including the world around it. I guess it goes to show that there
are many options even in the intimate world of macro photography!
I have to come clean. My idea of a macro lens is my 17-35f2.8AFS ultra
wide angle zoom. I guess part of my problem with doing macro is that I'm
only depicting a small part of the subject in the frame, eyeball
photography as it were. I prefer showing the world in which the subject
lives in my images. To do that in the macro realm, I shoot most often with
my ultra wides, getting really close physically to make the subject pop
while including the world around it. I guess it goes to show that there
are many options even in the intimate world of macro photography!